The shoemaker’s children are ill-shod. I came home yesterday – no bread.
Szewc bez butów chodzi. Wróciłem wczoraj do domu – nie ma chleba.
Wersja polska poniżej.
Luckily, I have a backup recipe for such situations. A couple months ago I got a book: “The Children’s Book of Baking Bread” by Abigail Wheatley and Sam Baer (sources). It’s been published in a very handy way (spiral-bound), also, the layout is simple and clear, and the recipes have small illustrations for most steps, which helps when working with a small illiterate. The units in ingredients are both metric (thank you!) and imperial, with a teaspoon here an there.

We’ve only done one recipe from it, and it’s simple enough to do some variations to it. I think the rest just waits for the Kids to pick it up.
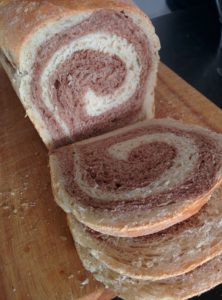
It is a basic white loaf, with an option to change flour to wholemeal. The first time we did it (with Helenka), we split the dough in half, added sesame to one bit, and cocoa powder to the other. Then we put one on the other and made a swirl. I may repeat it to make more photos.

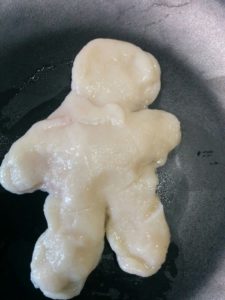
Helenka is quite creative in general.

Back to the bread. This time I decided to try wholemeal flour. The recipe suggested replacing it completely, I went with 70% wholemeal strong, 30% strong, as I feared it would come out too dense.
Ingredients
Makes a loaf or 12 rolls
- 350 g wholemeal wheat flour
- 150 g strong wheat flour
- 325 g water (hand-warm)
- 40 g butter (rather soft)
- 1 teaspoon dry yeast
- 1 teaspoon salt
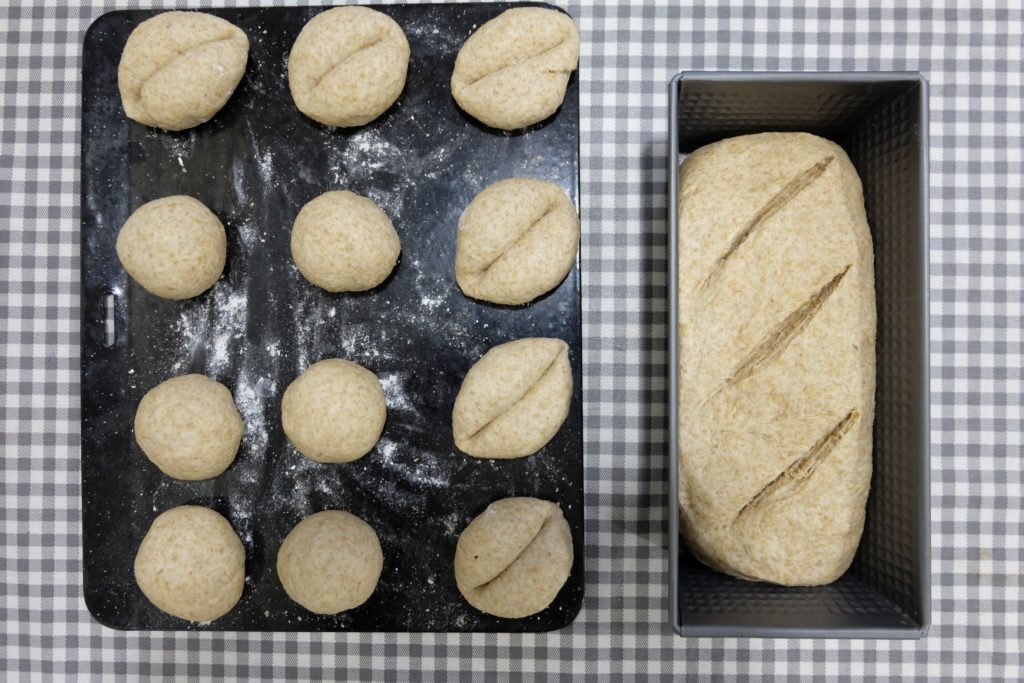
As you’ll see, I did two servings. I decided to make bread for breakfast and rolls for the supper.
Preparation
- Hand-mix all the ingredients, or if you’re in a hurry, let your mixer do the job
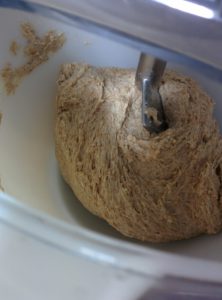
- Leave the dough for 50 minutes. I folded it once, after about 35 minutes. It feels nice and soft.
- Shape the dough:
- bread: I stretch the dough flat, roll it into a swirl, then roll it with hands into a thick stripe, which I roll into a swirl again. Then I just roll it with hands again to match the length of a loaf tin. It’s about 25-26 cm in my case. After such process you can feel the dough is well stretched and springy. Also, the shape is way more regular. If you notice that the dough starts tearing at any point, give it a minute rest to regain plasticity. It will also help the dough hold shape afterwards. Put the load into a tin and cut it with a knife (If all is well, the loaf will not crack elsewhere when baked)
- rolls: divide the dough in 12 more or less equal bits (about 70-75 g each), round them. I also took a wooden spoon and split some of them with the handle.
- Leave the bread/rolls for about 30 minutes. Set your oven to 180C (the recipe says 220C, but my oven tends to burn things when the temperatures are as high as the recipe says, if something is to be baked for over 10 minutes). Put water in a oven-safe dish at the bottom. Know your oven
- Put the dough into the oven. This time I covered it with kitchen foil to reflect the heat radiating from the heating elements. I baked the rolls for about 15-20 minutes (without the foil at the end). The bread needed 25-30 minutes.
- Let it cool down before eating. The crust may be a bit hard straight out of the oven, but it will improve. The steam escaping the inside of the loaf softens it, stabilising the whole loaf’s humidity. If you cut a hot roll, it will be very humid inside, and will quickly begin to crumble.
That’s it. I started at 5 p.m., we started eating the rolls at 8 p.m. The ones with a split were good to eat earlier. Next time I will try 100% wholemeal.
Na szczęście mam awaryjny przepis na takie sytuacje. Kilka miesięcy temu kupiłem książkę: “The Children’s Book of Baking Bread” autorstwa Abigail Wheatley i Sama Baer (źródła). Została wydana w sposób bardzo poręczny (drutowany grzbiet). Ponadto układ jest prosty i czytelny, a przepisy są uzupełnione ilustracjami do większości kroków, co jest pomocne, gdy pracujesz z małym analfabetą. Składniki podane w systemie metrycznym i imperialnym, z łyżeczką tu i ówdzie.

Póki co zrobiliśmy tylko jeden przepis z tej książki. Jest na tyle prosty, że łatwo go modyfikować. Myślę że pozostałe czekają, aż dzieci zachcą zrobić coś nowego.
Przepis daje prosty biały chleb, z opcją na pełnoziarnisty. Pierwszy raz gdy go robiliśmy (z Helenką), podzieliliśmy ciasto na pół, dodaliśmy sezam do jednej i kakao do drugiej połowy. Następnie ułożyliśmy ciasto jedno na drugim i zrolowaliśmy. Może zrobię go jeszcze raz, żeby mieć więcej zdjęć.

Helenka generalnie jest dość kreatywna.

Wracając do chleba. Tym razem dodałem mąkę pełnoziarnistą. W przepisie sugerowano całkowite zastąpienie, ja dałem 70% pełnoziarnistej i 30% chlebowej, bo bałem się, że będzie zbyt zbity.
Składniki
Ilość na jeden bochenek lub 12 bułek
- 350 g mąki pszennej pełnoziarnistej
- 150 g mąki pszennej chlebowej
- 325 g wody (ciepłej, nieparzącej)
- 40 g masła (raczej miękkie)
- 1 łyżeczka drożdży w proszku
- 1 łyżeczka soli
Jak zobaczycie, zrobiłem dwie porcje. Postanowiłem zrobić chleb na śniadanie i bułki na kolację.
Przygotowanie
- Wymieszaj dłońmi wszystkie składniki, lub jeśli się śpieszysz, powierz to mikserowi.
- Zostaw ciasto na 50 minut. Ja po około 35 minutach złożyłem je. Jest miłe i delikatne w dotyku.
- Uformuj ciasto:
- chleb: Rozpłaszczyłem ciasto (bez rwania), zrolowałem i rolując rozciągnąłem na gruby pasek, po czym zwinąłem go w ślimaka i rolowałem znów aż osiągnąłem długość, pasującą do foremki (w moim przypadku 25-26 cm). Po takiej obróbce poczujesz, że ciasto jest ładnie napięte i sprężyste, poza tym kształt jest dość regularny. Jeśli zauważysz, że ciasto się zaczyna rwać, zostaw je na minutę, aby odzyskało plastyczność. To pomoże też je później uformować. Włóż do foremki i natnij bochenek nożem (jeśli pójdzie dobrze, to będą jedyne miejsca, gdzie się rozejdzie).
- bułki: podziel ciasto na 12 mniej więcej równych porcji (około 70-75 g każda), uformuj kulki. Wziąłem też drewnianą łyżkę i część przepołowiłem rękojeścią.
- Pozostaw chleb/bułki na około 30 minut. Włącz piekarnik na 180C (autorzy każą 220C, ale mój piekarnik ma skłonności do przypiekania rzeczy przy temperaturach ponad 200C, jeśli się je piecze dłużej niż 10 minut). Włóż na spód naczynie z wodą. Znaj swój piekarnik
- Włóż ciasto do piekarnika. Tym razem przykryłem je folią aluminiową, aby powstrzymać ciepło promieniujące od grzałki. Piekłem bułki przez 15-20 minut (na koniec bez folii), a chleb 25-30 minut.
- Chleb musi wystygnąć przed jedzeniem. Zaraz po wyjęciu, skórka może być dość twarda, ale ulegnie poprawie. Para uciekająca ze środka zmiękczy ją, stabilizując wilgotność całego bochenka. Jeśli rozkroisz gorącą bułkę, będzie bardzo wilgotna w środku i zacznie się kruszyć.
To tyle. Zacząłem o 17, kolacja była gotowa o 20. Bułki dziabnięte łyżką wystygły nieco szybciej. Następnym razem spróbuję użyć tylko mąki pełnoziarnistej.


