Oh, I love to have a good bagel from time to time. The first one I remember was in August 2010, in Galway. Since then, I had a bagel here and there, but nothing special (apart from one with smoked salmon in The Lordship Hub). Now that I happen to bake bread, it seems like a good time to make a proper bagel or fourteen.
Uwielbiam od czasu do czasu zjeść dobrego bajgla. Pierwszy raz jadłem takiego w sierpniu 2010 w Galway. Od tego czasu sprawiałem sobie jednego od czasu do czasu, ale zazwyczaj nie było to nic wyjątkowego (poza kanapką z wędzonym łososiem w The Lordship Hub). Teraz, gdy piekę, wydaje się dobrym pomysłem upieczenie jednego czy czternastu.
Po polsku poniżej.
The obvious recipe choice is from Jeffrey Hamelman’s “Bread”. This is the best book on baking I have had so far.
Planing the timing
The recipe requires the bagels to proof for at least six hours in the fridge after shaping. Or more. I made dough after the kids went to bed, shaped it and popped into fridge before going to bed, then I boiled the bagels and baked them in the morning. Perfect for a Sunday breakfast.
Ingredients
- 901 g high gluten flour
- 538 g water (quite warm, as the recipe suggests the dough should be over 24 Celsius degrees warm after mixing).
- 6 g diastatic malt powder
- 4 g instant yeast
- 17 g salt
You will also need some malt syrup for boiling the bagels. The recipe suggests 60 g per 1 litre of water. I used a pot of 24 cm diameter which easily fitted three bagels for cooking in two litres of water, so 120 g of syrup was required.
About ingredients
It’s also optional to use seeds for sprinkle. The first time I made three types: with poppy, lin and sesame. By the end I mixed them together and added a bit of black onion seeds. The last ones turned out the best. This time I only used poppy and nothing.
It took me a while to try it because I had no idea what a high gluten flour was. While looking for answers, I found a nice article on Leaf on how to get a high gluten flour out of strong flour with use of vital wheat gluten. To make it not so easy, they used volume measures that I do not consider proper for baking, as for instance a cup of flour on top of bag can weigh less than a cup of flour on the bottom where it is more packed. That is why I usually assume approximate measures for starters, store them in grams and then improve if the results are not satisfactory. I needed 900 grams of high gluten flour – in this case I checked what is considered to be gram measurement of a cup of strong flour and took 150 g for conversion, then added two teaspoons of vital wheat gluten per each 150 g of flour (12 teaspoons altogether) and then weighed the difference – 55 g. This gives 6 g of vital wheat gluten per 100 g of flour. This ration gives satisfactory results – the first time I made them, I think I added less and the bagels were wrinkly as Grandpa Pig.
As you easily notice, I ended up with 955 g of flour. I’m a bit of hypocrite when it comes to ingredients measuring – I always say it is important to be super precise and not always follow what I say. I added about 20 g water more as a result – I’ve noticed flours in UK need less water than the recipes suggest, unless they are made using Canadian grains. This way I only violated the flour to salt ratio.
I don’t have diastatic malt powder, so I used a teaspoon of barley malt syrup.
Preparation
- This is something I like about this recipe: mix all ingredients together. I used my planetary mixer with a dough hook, medium speed. I know medium is not a number, but you need to know your gear. Mine is quite universal and has eight speeds on the scale. I think half of them are too fast for dough, so medium is somewhere around speed 3. It took me about 5 minutes and the dough was a bit like playdough, but more springy and firmer.
- Leave it covered for an hour
- Divide into rectangular chunks of 110g. What I did is I rolled the dough with my hands to an irregular shape of about 15 cm length, next I rolled it into a spiral and rolled it again into a similar shape, but this time it became quite regular. The whole dividing and shaping took me about 5 minutes, which gave the dough enough time to rest a little bit and regain plasticity to continue preparation.
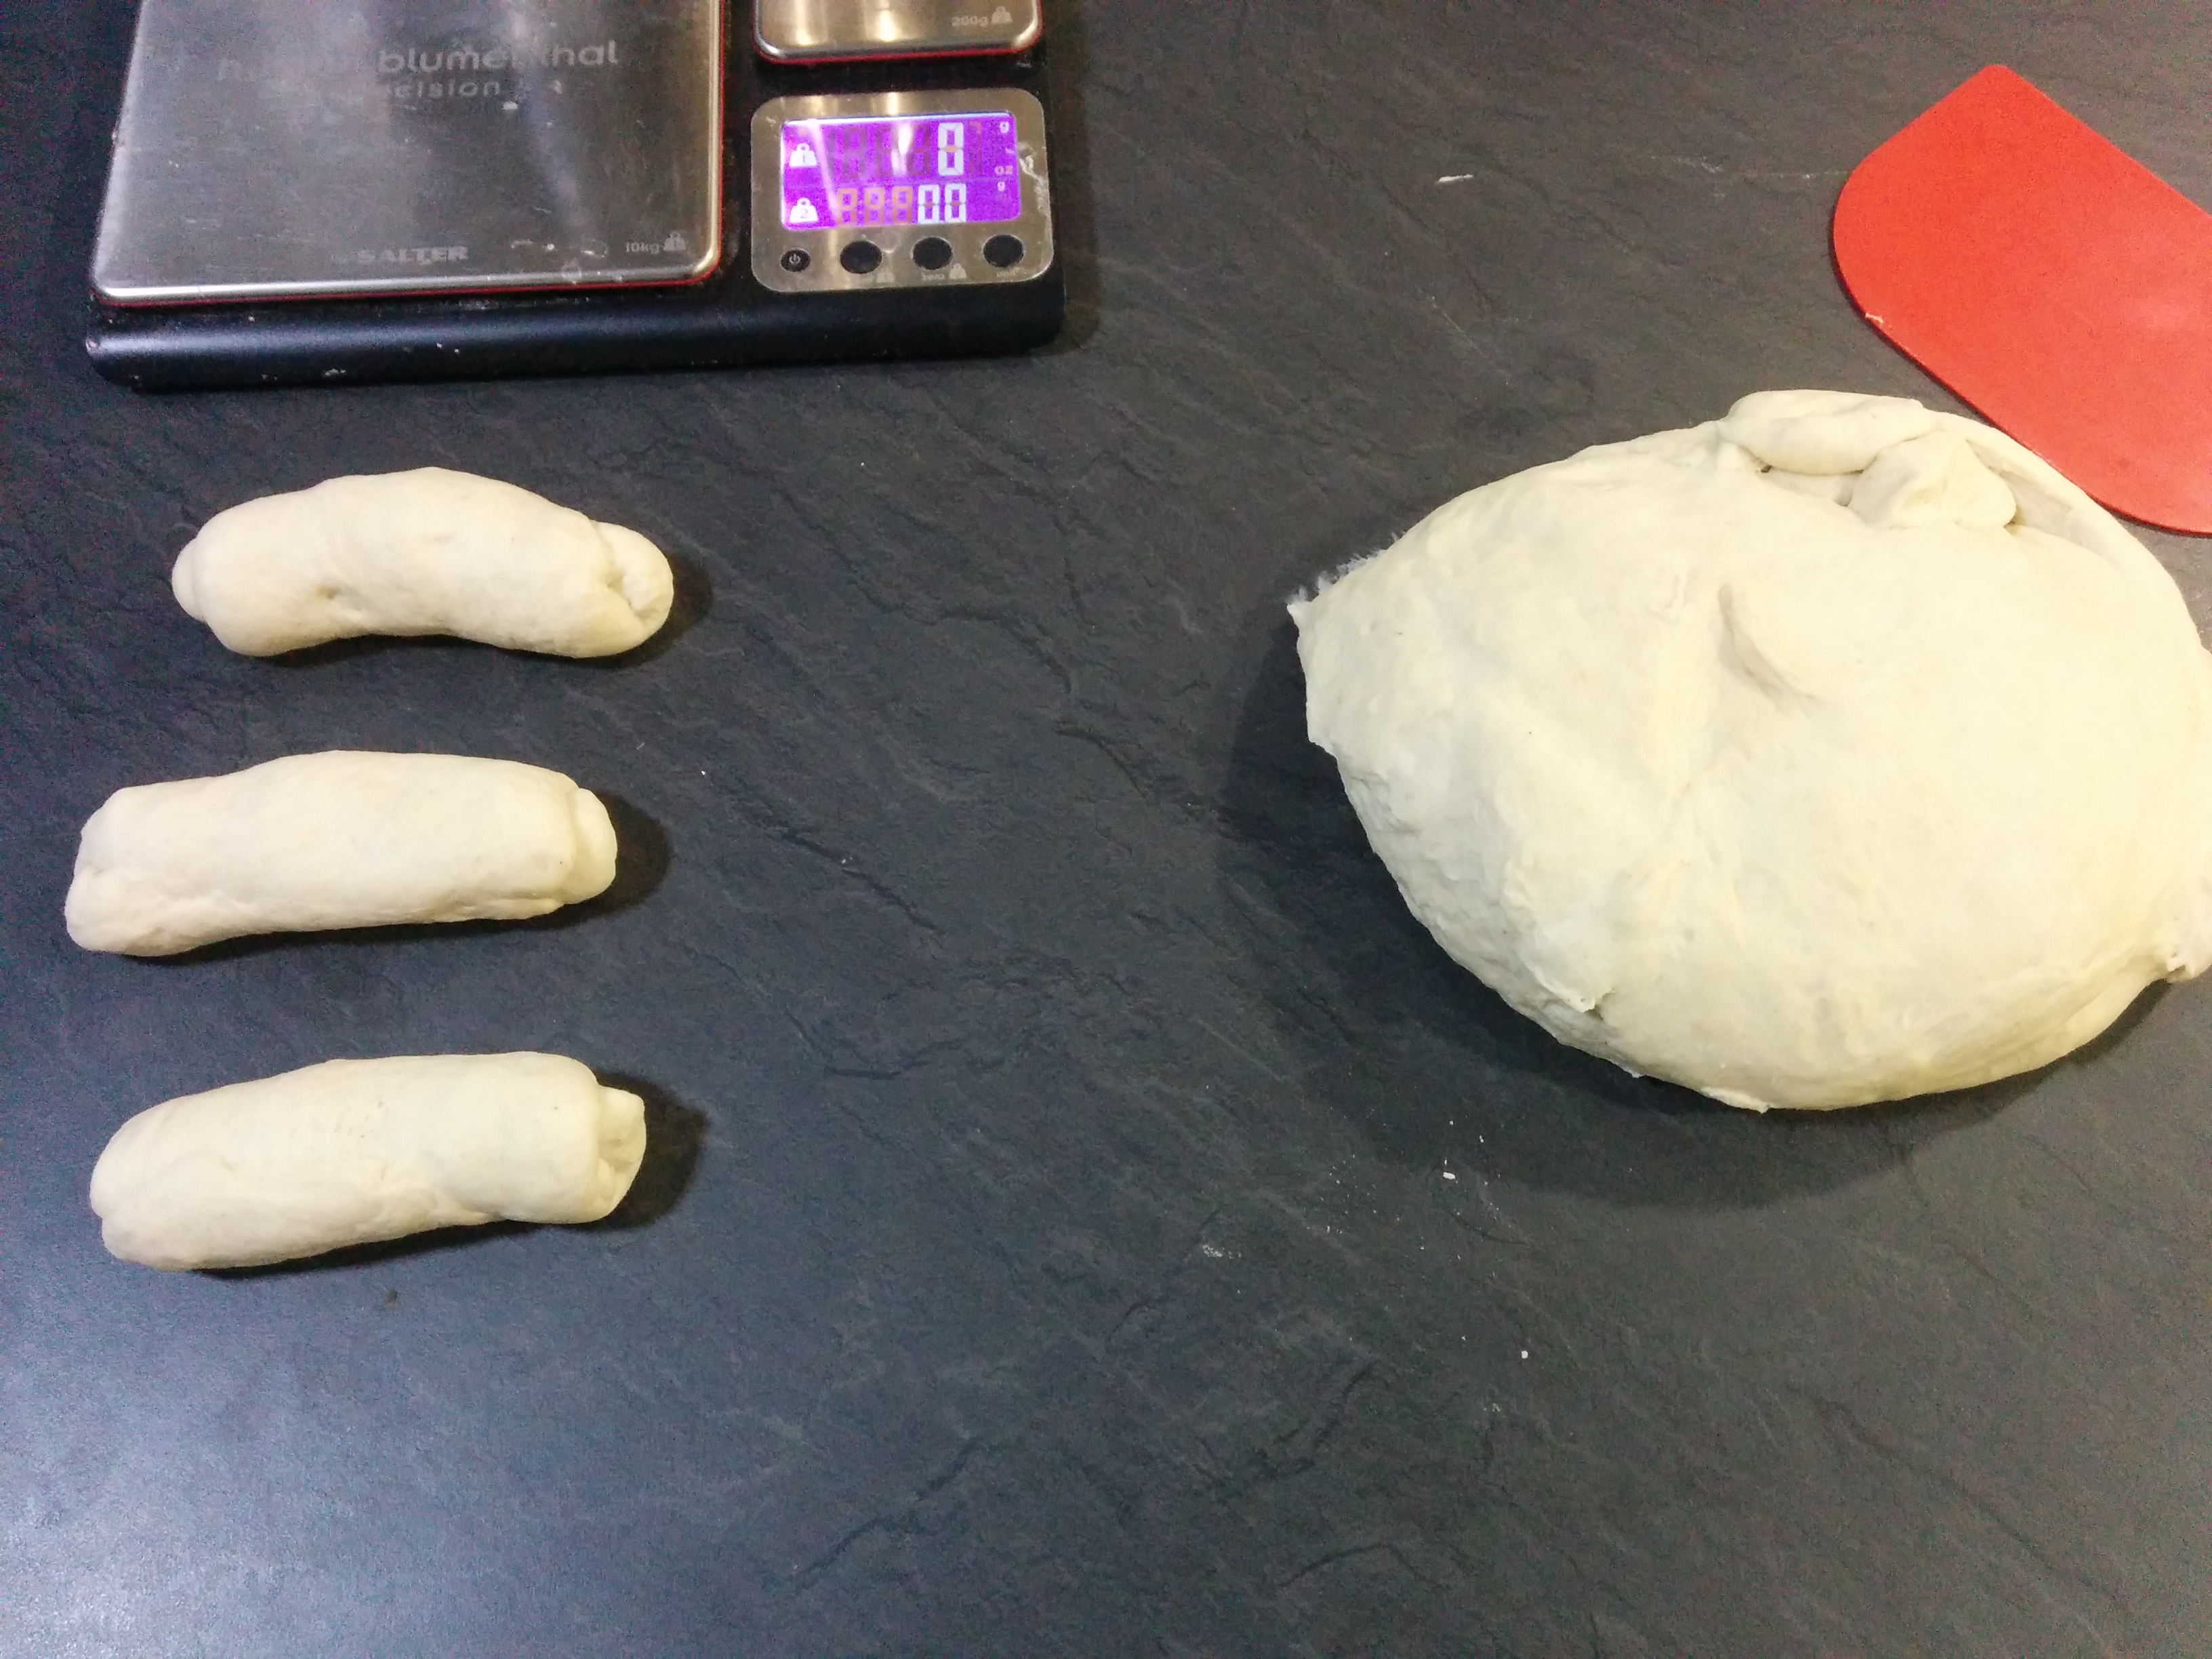
Partially portioned and preshaped dough - I took each chunk, rolled it with hands to an even stripe of about 25 cm length, then roll it around your hand to have both ends of the stripe on the palm of your hand. Then roll it on the table to make a circle. If I were doing them again, I would try to make them a bit smaller, to have a smaller hole. Not that I don’t like it, but the sandwich content falls through.
- Place them on a tray sprinkled with semolina (Polish manna) and put in the fridge for at least 6 hours.
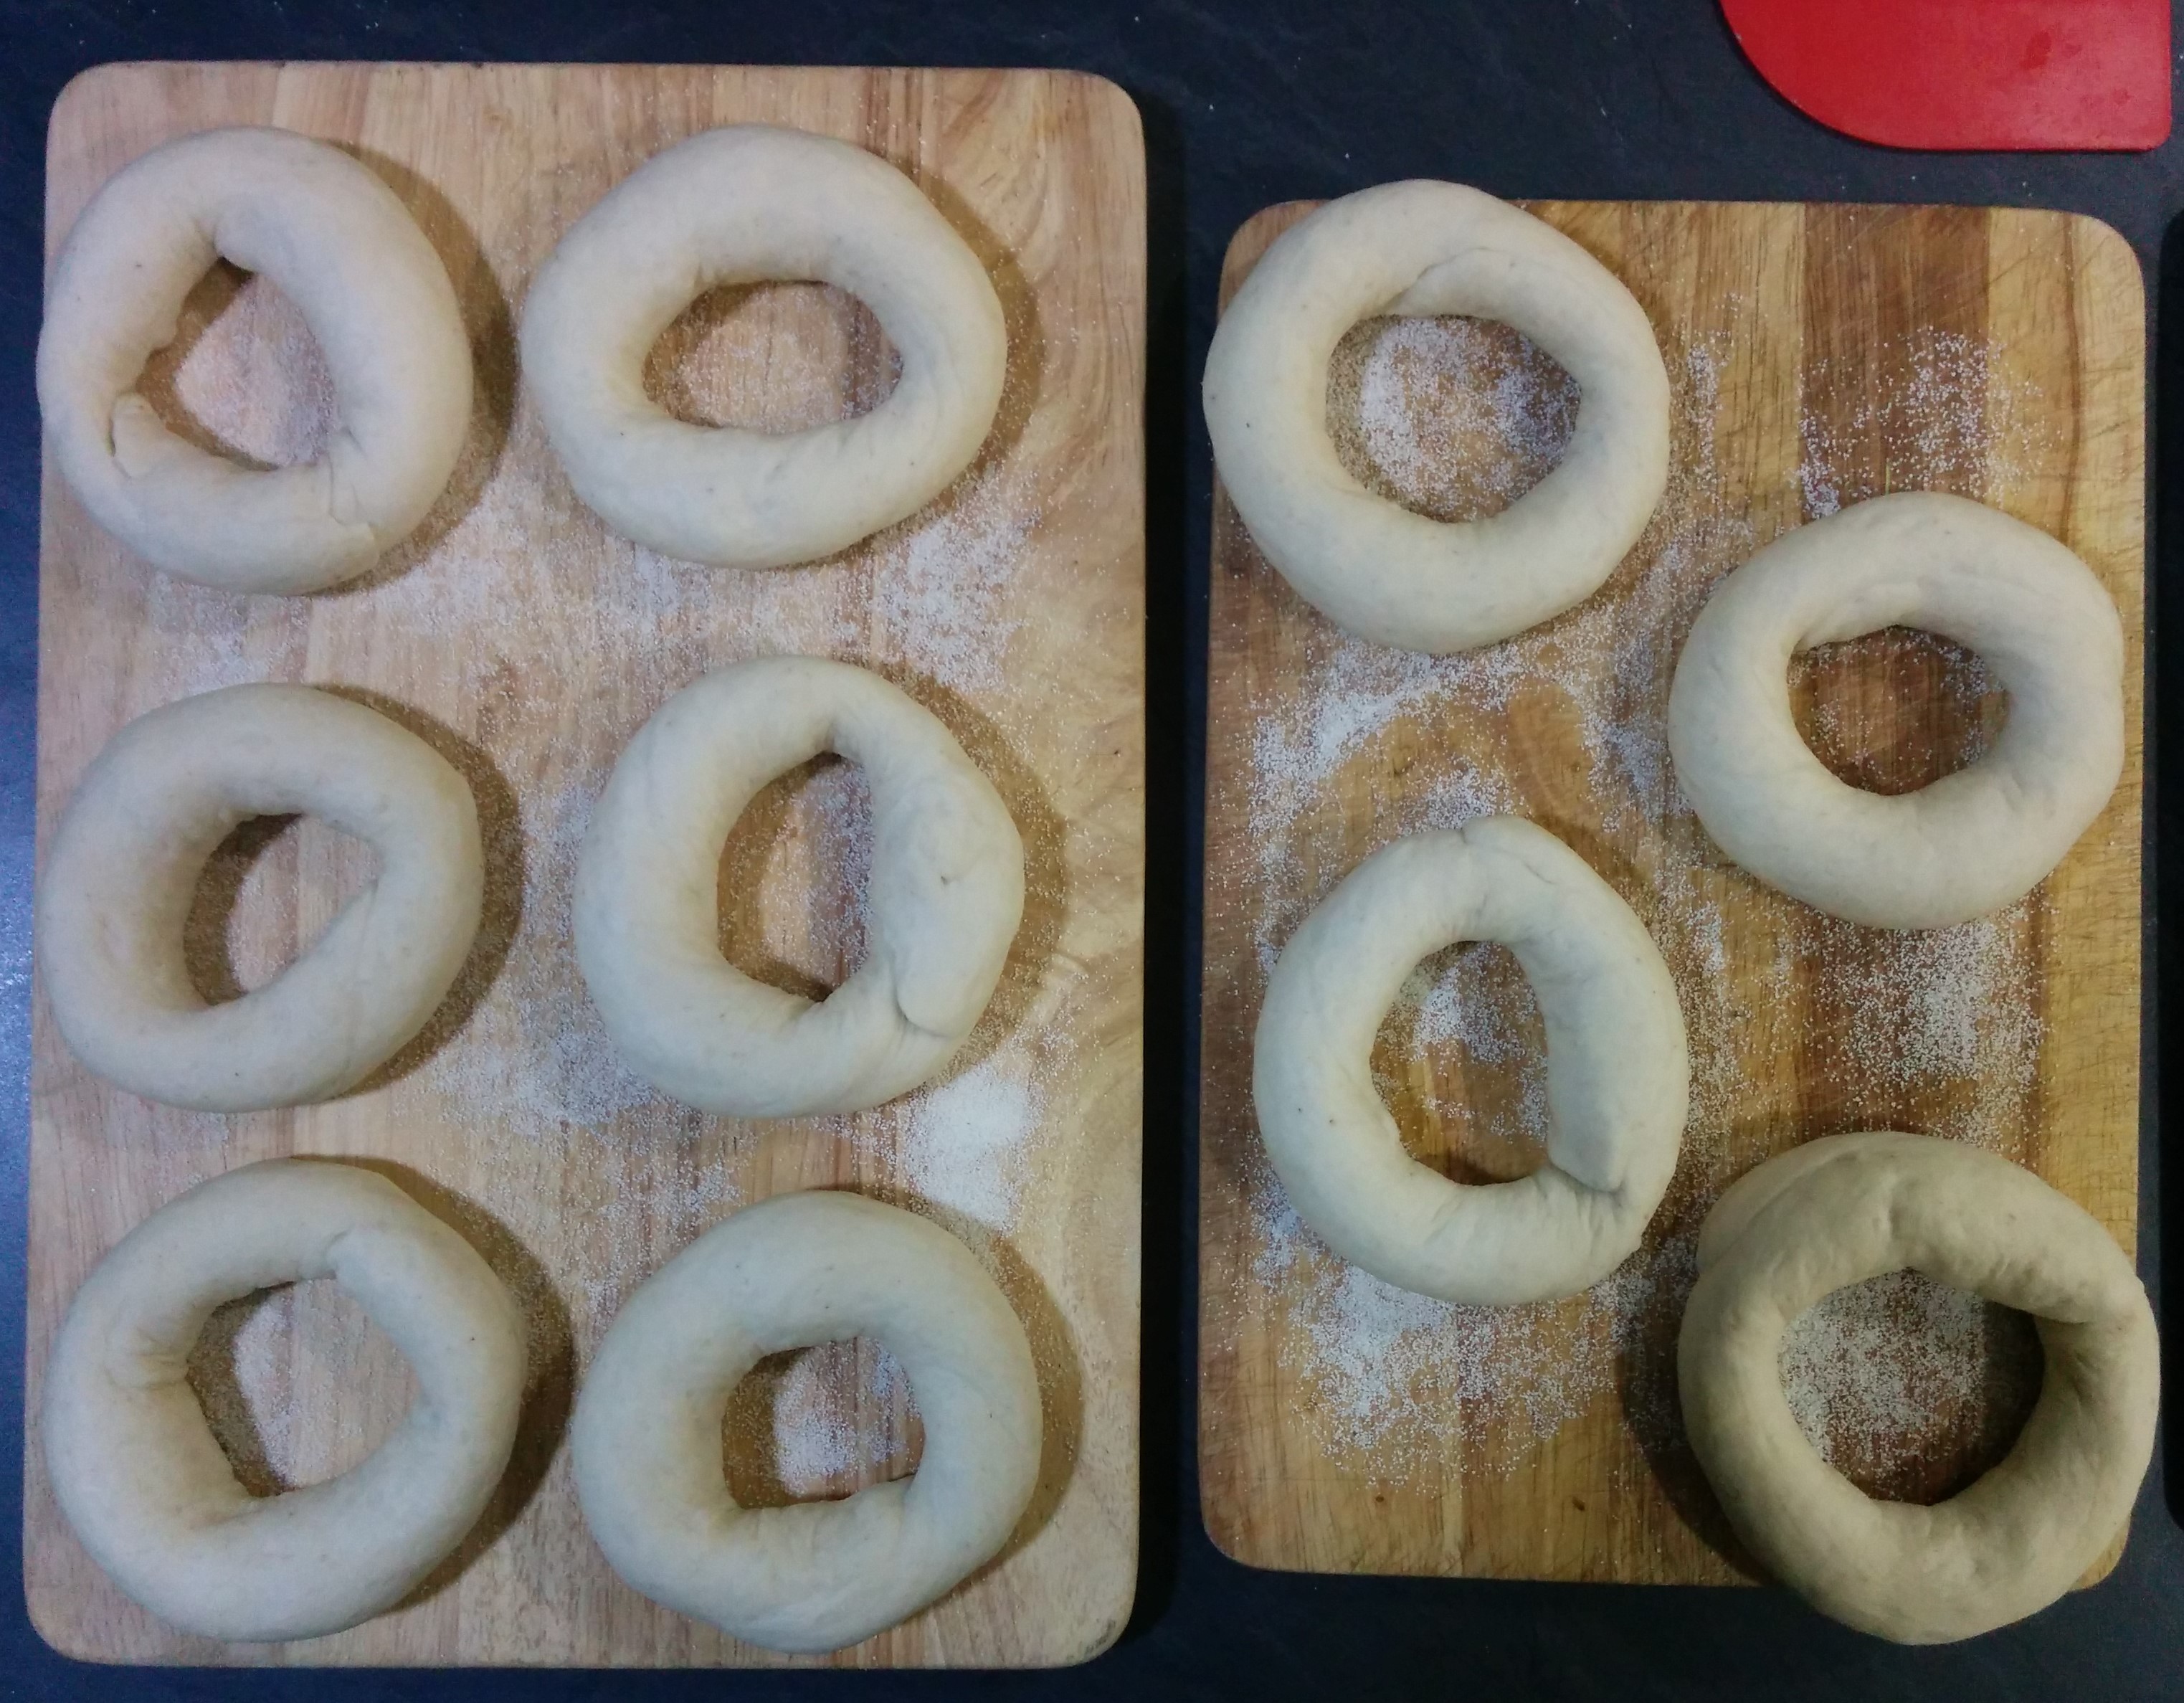
Shaped bagels - In the morning turn the oven on without convection, up and down, to 260C. At least the recipe says that much. I did 230C and had to shield the heating elements to do some heat screening, so that they don’t burn the crust immediately (I use extra trays above and beneath).
- Bring water with syrup to boil and boil the bagels for 45s. I boiled three at a time. Then drain them and place on a cooling rack. If you need more time before baking, cool them down in a bowl with cold water. For a single serving, I don’t think it’s needed.
- If you want to sprinkle the bagels, put them in the seeds about 4 minutes after boiling. I keep the seeds on a small plate and just put each ring on it.
- Place the rings on a tray sprinkled with semolina. If seeded, put them with seeds down.
- Put them into the oven. After three or four minutes they should already have a visible shiny crust forming. This is the right moment to flip them quickly upside down and continue baking for another 15-18 minutes. Or 13, as in my case.
- Take them out, put them on a cooling rack.
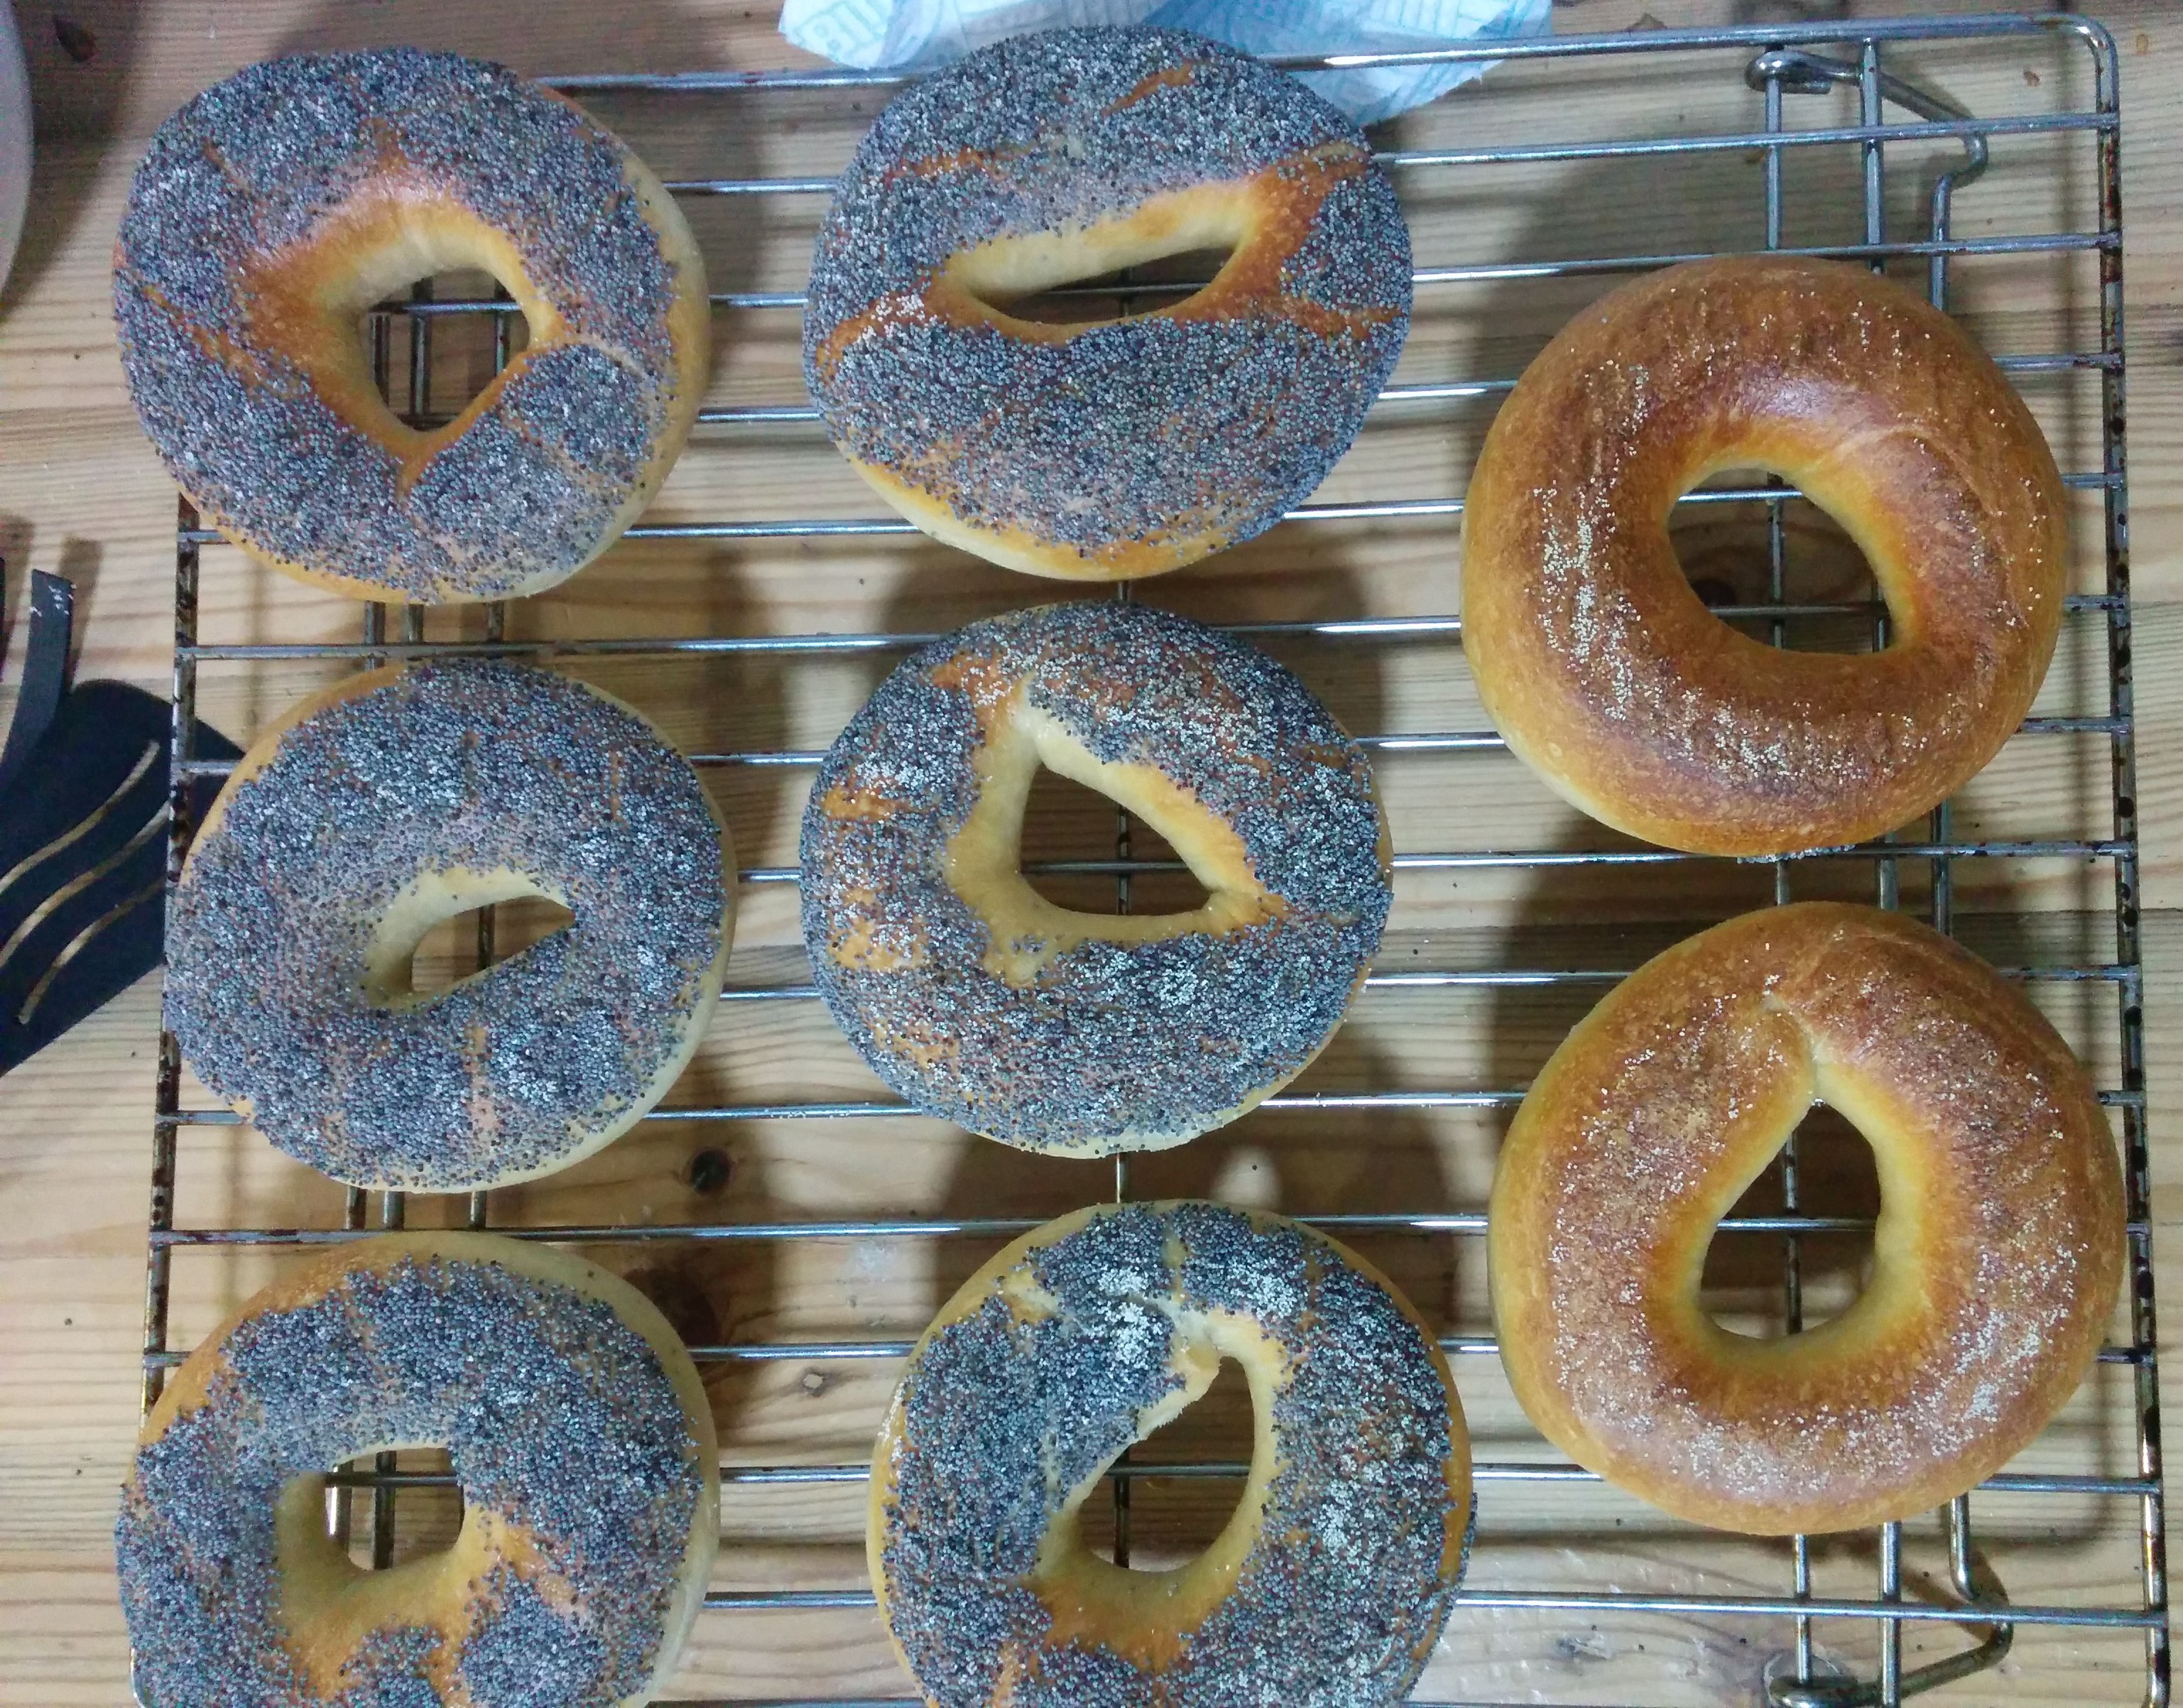
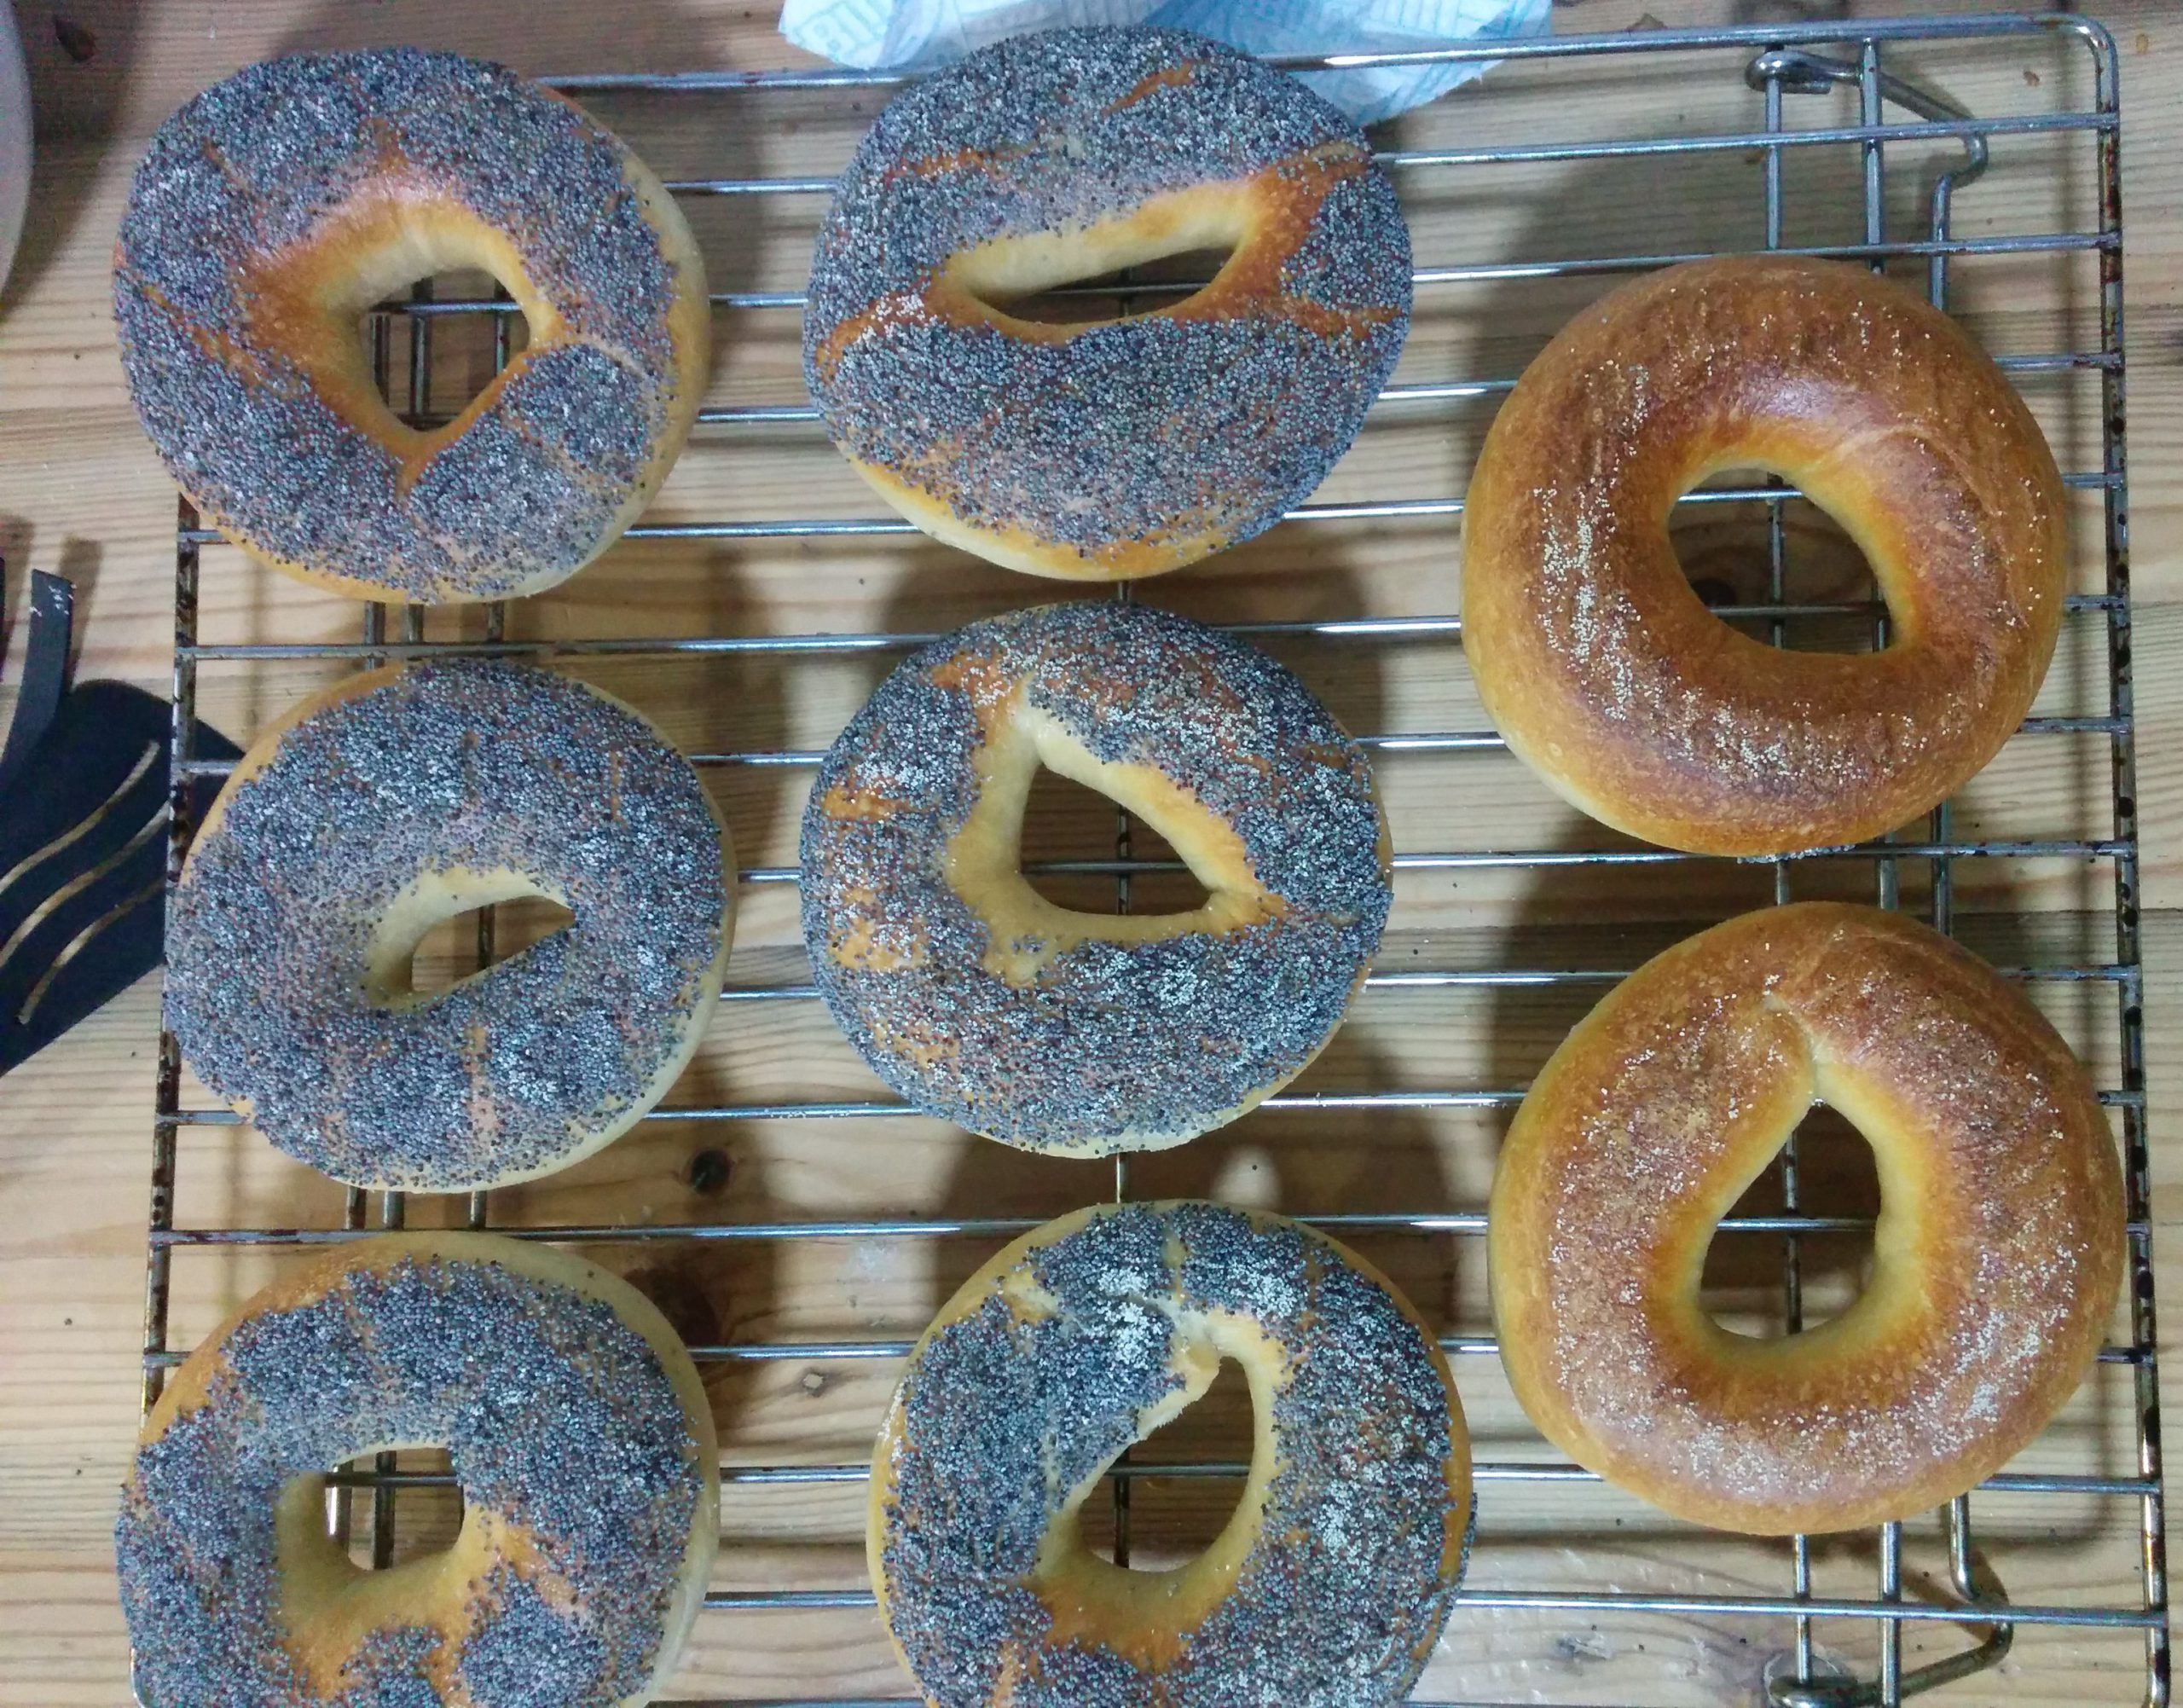
Bagels cooling down on a rack
Most bagels we made disappeared within one hour from being baked, rest did not survive the supper. Some of them had larger holes because I did not degas them properly when shaping.
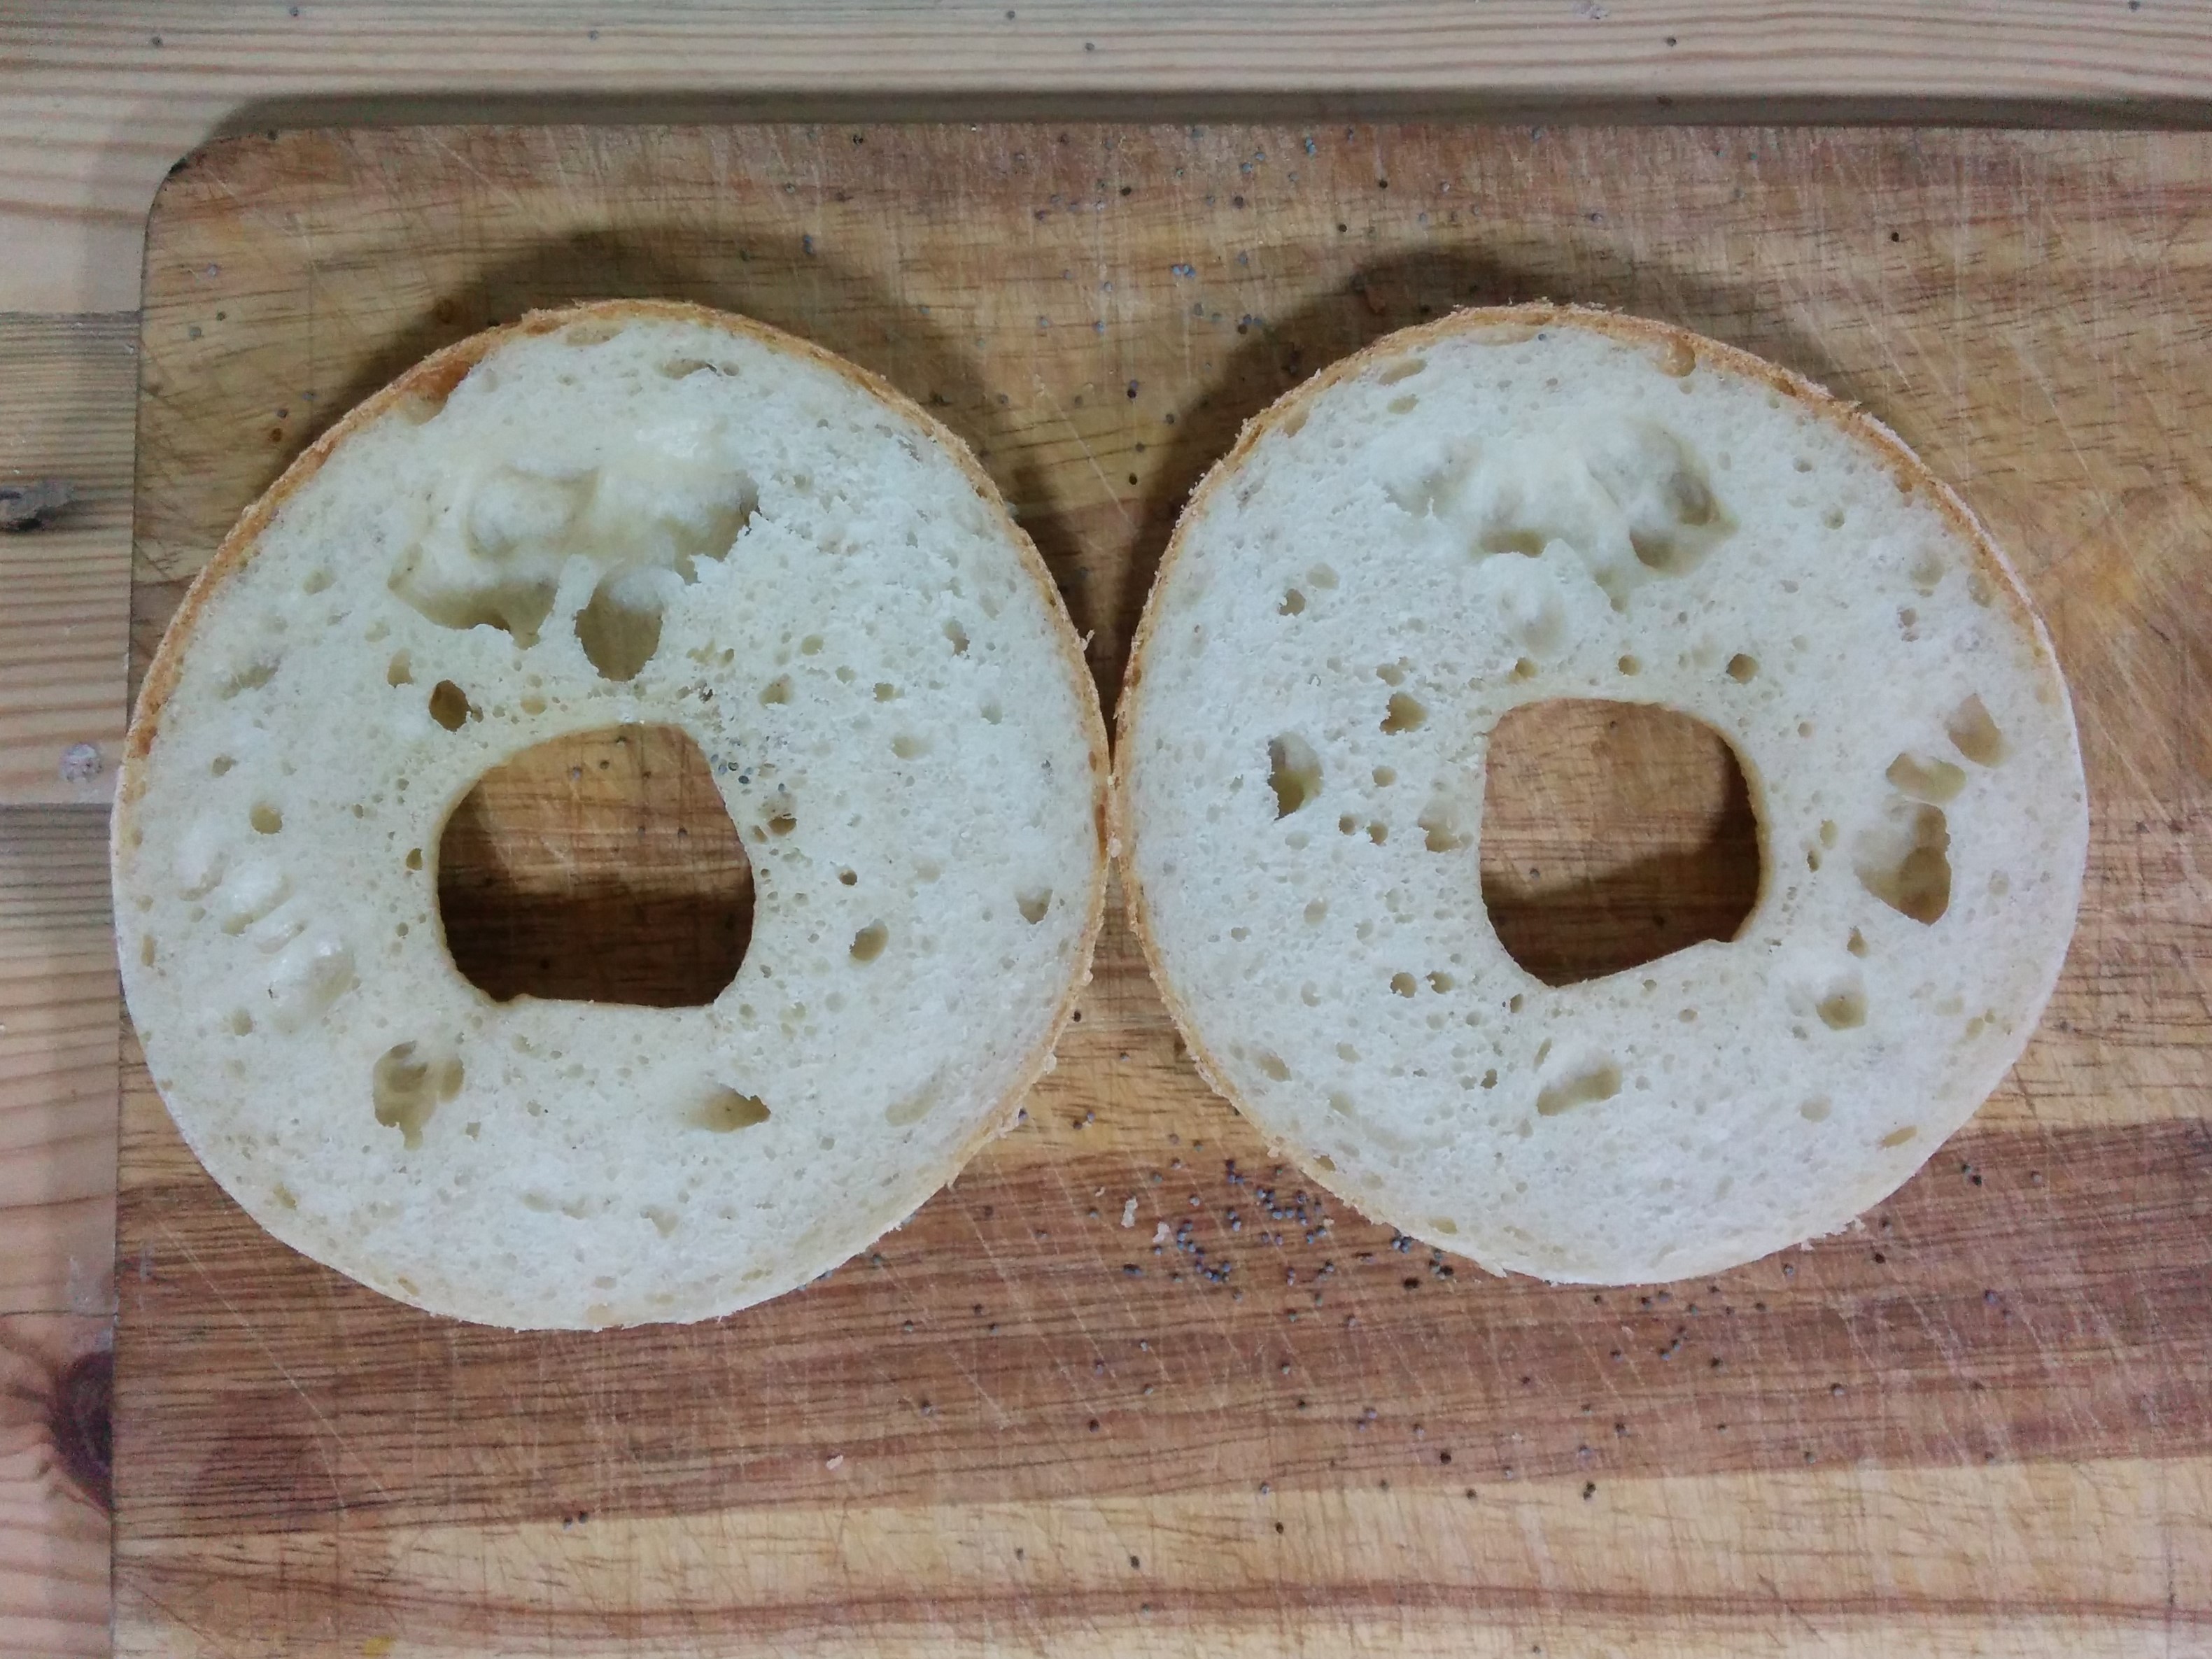
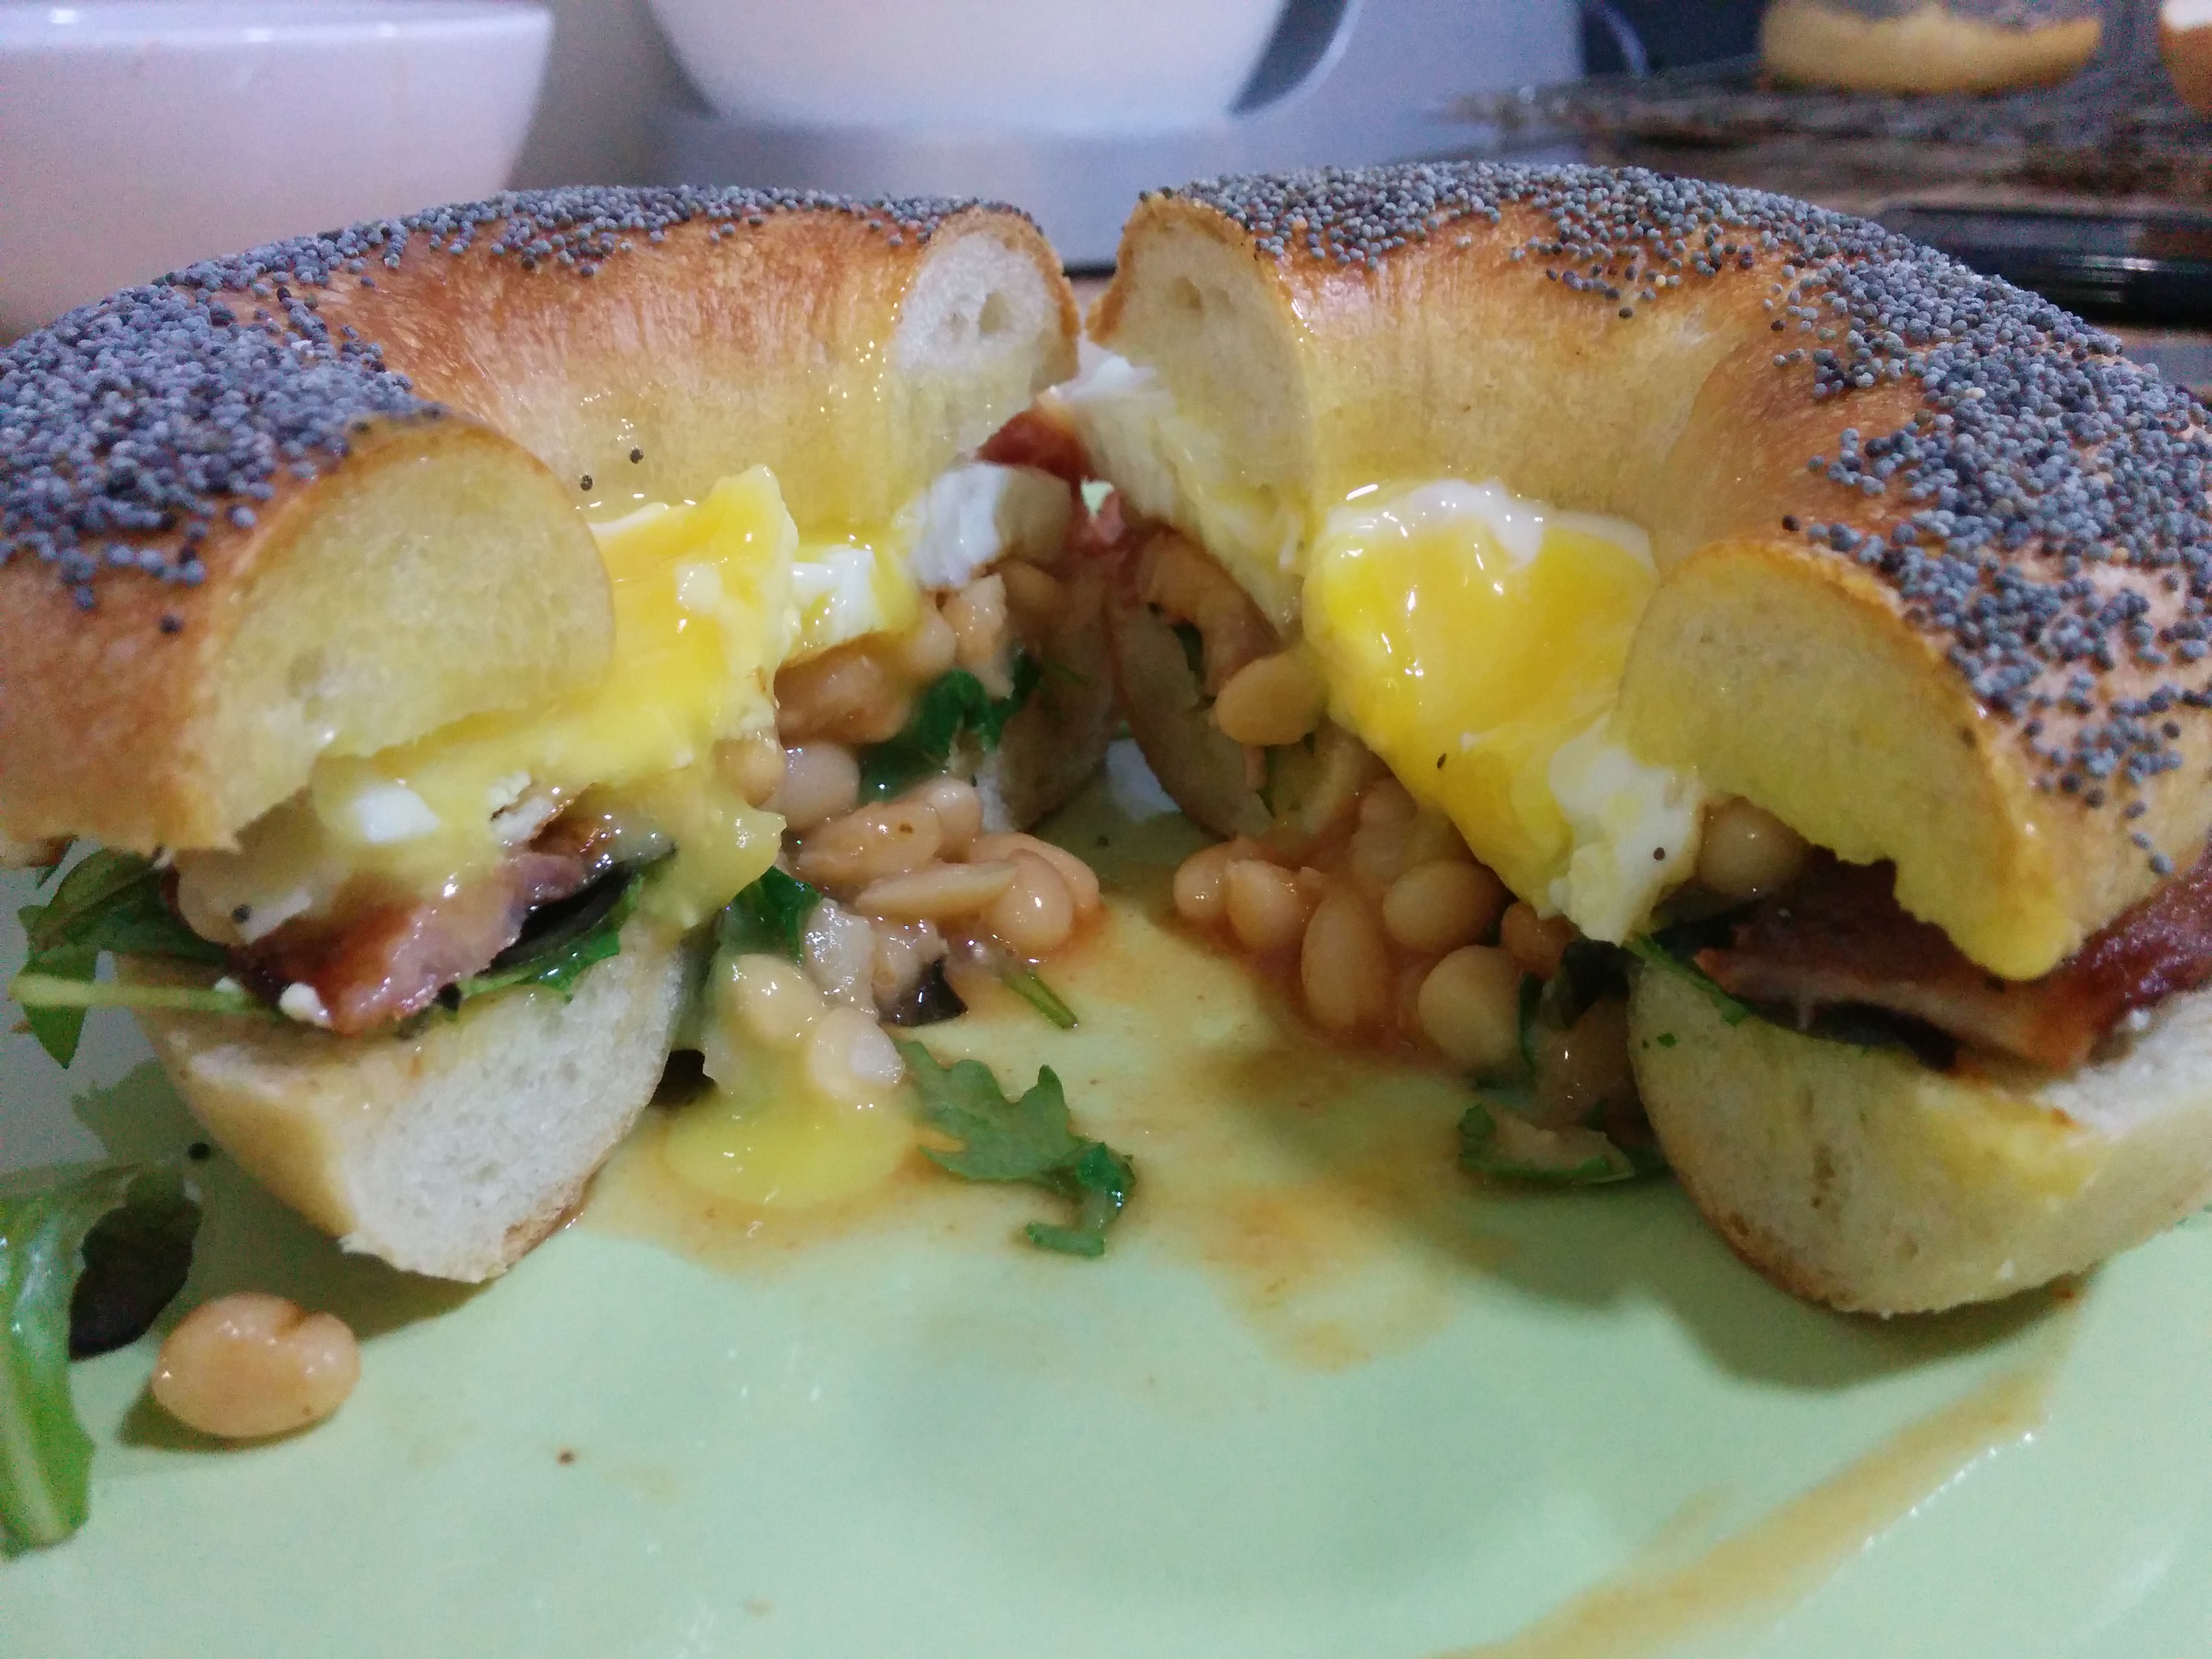
Serving suggestion
Excuse my lacking visual skills. English Breakfast bagel:
Wybór receptury był oczywisty: z książki “Chleb” J. Hamelmana (polskie wydanie w dobrym przekładzie autorki The White Plate). To jest najlepsza książka o pieczeniu, jaką dotychczas miałem.
Organizacja czasu
W przepisie podane jest, że bajgle muszą rosnąć po formowaniu co najmniej sześć godzin w lodówce. Ja zrobiłem ciasto po położeniu dzieci do łóżek, uformowałem i wrzuciłem do lodówki przed pójściem spać, a parzyłem je i piekłem z rana, zanim rodzina wstała (no, dzieci już wstały). Idealne na niedzielne śniadanie.
Składniki
- 901 g mąki wysokoglutenowej
- 538 g wody (dość ciepłej, w przepisie jest napisane, że ciasto powinno mieć ponad 24 stopnie Celsjusza po zmieszaniu).
- 6 g diastatycznego słodu w proszku
- 4 g drożdży instant
- 17 g soli
Będziesz też potrzebować trochę syropu słodowego, aby ugotować bajgle. Receptura mówi o 60 g na 1 litr wody. Używałem garnka o średnicy 24 cm, który mieścił trzy bajgle. Wystarczyło mi przy tym dwa litry wody, więc potrzeba 120 g syropu.
O składnikach
Można opcjonalnie użyć ziaren jako posypki. Pierwszy raz robiłem trzy rodzaje posypek: mak, len i sezam. Pod koniec każdej miałem za mało, więc zmieszałem je i dodałem jeszcze trochę czarnuszki. Te ostatnie były najlepsze smakowo. Tym razem robiłem tylko z makiem i czyste.
Trochę mi zeszło zanim spróbowałem upiec bajgle, bo nie wiedziałem, co to mąka wysokoglutenowa. Gdy szukałem odpowiedzi, znalazłem zadowalający mnie artykuł, wyjaśniający jak uzyskać taką mąkę z chlebowej, z użyciem glutenu w proszku. Żeby nie było za łatwo, autorzy użyli miar objętościowych, których nie uznaję za właściwe w pieczeniu, bo przykładowo filiżanka mąki z dna worka jest bardziej upakowana i będzie ważyć więcej niż z wierzchu. Dlatego zazwyczaj szukam jakiejś konwersji w internecie, mierzę, ile wynosi stosunek wagowy i zapisuję sobie. Jeśli za pierwszym razem rezultat nie jest satysfakcjonujący – poprawiam, ale już operuję tylko na gramach. W tym wypadku 900 g mąki chlebowej to około 6 filiżanek, dwie łyżeczki na filiżankę dało łącznie 55 g glutenu, wyszło zatem 6 g glutenu na 100 g mąki chlebowej. Z rezultatu jestem zadowolony, bo wcześniej bajgle wychodziły mi zmarszczone jak Dziadziuś Świnka.
Łatwo zauważysz, że wyszło 955 g mąki. Jestem trochę hipocrytą, jeśli chodzi o mierzenie składników – zawsze mówię, że ważne jest być dokładnym i jednocześnie nie słucham siebie za każdym razem. Dodałem jeszcze około 20 gramów wody – mniej niż wynika z proporcji, ale zauważyłem, że mąki w Wielkiej Brytanii potrzebują mniej wody niż jest w przepisie, chyba że są robione z ziaren kanadyjskich. Zepsułem zatem jedynie proporcje mąki do soli.
Nie mam słodu diastatycznego, więc użyłem łyżeczki syropu słodowego.
Przygotowanie
- To jest coś, co lubię w tym przepisie: wymieszaj wszystkie składniki razem. Użyłem miksera planetarnego z hakiem do ciasta, na średniej prędkości. Wiem że średni to nie liczba. Prawda jest taka, że musisz znać swoje narzędzia. U mnie mikser ma osiem prędkości, że czego połowa jest zbyt duża na ciasto chlebowe. Dlatego prędkość trzecią uważam za średnią. Po pięciu minutach miałem gotowe ciasto, trochę podobne do ciastoliny, ale bardziej sprężyste i sztywniejsze.
- Przykryj i zostaw na godzinę.
- Podziel na prostokątne kęsy po 110 g. Ja kawałek ciasta ukształtowałem w dłoniach na wałek o długości około 15 cm. Następnie zwinąłem go w spiralę i znów ukształtowałem na taki wałek. Po takim zabiegu był nieco regularniejszy. Całe dzielenie i wstępne kształtowanie zajęło mi około 5 minut, co było wystarczającym czasem, aby ciasto zrobiło się nieco bardziej plastyczne przed właściwym wyrabianiem.

Częściowo podzielone i wstępnie uformowane ciasto - Każdy kawałek rolując uformowałem w pasek o długości około 25 cm. Następnie owinąłem nim swoją dłoń tak, aby trzymać w niej końcówki, i rolując na blacie połączyłem je. Gdybym robił jeszcze raz, pewnie bym się starał zrobić mniejsze. żeby była mniejsza dziura. Nie to że nie lubię, ale zawartość kanapki wypada.
- Ułóż na tackach lub deskach posypanych semoliną (manną) i schowaj do lodówki na minimum 6 godzin.

Uformowane bajgle - Rano włącz piekarnik bez termoobiegu, góra i dół, na 260C. Przynajmniej tyle jest w przepisie. Ja użyłem 230C i musiałem ekranować grzałki foremkami między nimi a bajglami, inaczej ciasto się przypalało. Umieściłem je na szczycie i dnie piekarnika.
- Zagotuj w garnku wodę z syropem słodowym i wyparz wszystkie bajgle po 45 sekund. Ja parzyłem trzy jednocześnie. Następnie odsącz je i umieść na kratce do wysuszenia. Jeśli chcesz mieć więcej czasu, a nie piec od razu, ochłodź je mocząc w zimnej wodzie. Jeśli robisz jedną porcję, nie sądzę żeby to było konieczne.
- Jeśli chcesz posypać bajgle ziarnami, umieść je w ziarnach około 4 minuty po gotowaniu. Ja mam ziarna na małym talerzyku i tylko kładę każdy krążek na nich.
- Umieść bułki na blasze posypanej semoliną. Jeśli użyłeś ziaren, połóż ziarnami w dół.
- Włóż je do piekarnika. Po trzech minutach powinna się już wysuszać skórka. To jest właściwy moment, aby je odwrócić i piec przez kolejne 15-18 minut. U mnie 13.
- Wyjmij je i umieść na kratce do ostygnięcia.

Bajgle stygnące na kratce
Większość zniknęła w godzinę od pieczenia. Reszta na kolację. Część miała duże dziury w cieście, bo nie udało mi się dobrze odgazować ciasta przy formowaniu.

Proponowany sposób podania
Wybaczcie brak umiejętności prezentacji. Bajgiel “Angielskie Śniadanie”:

One Reply to “Bagels. Bajgle.”