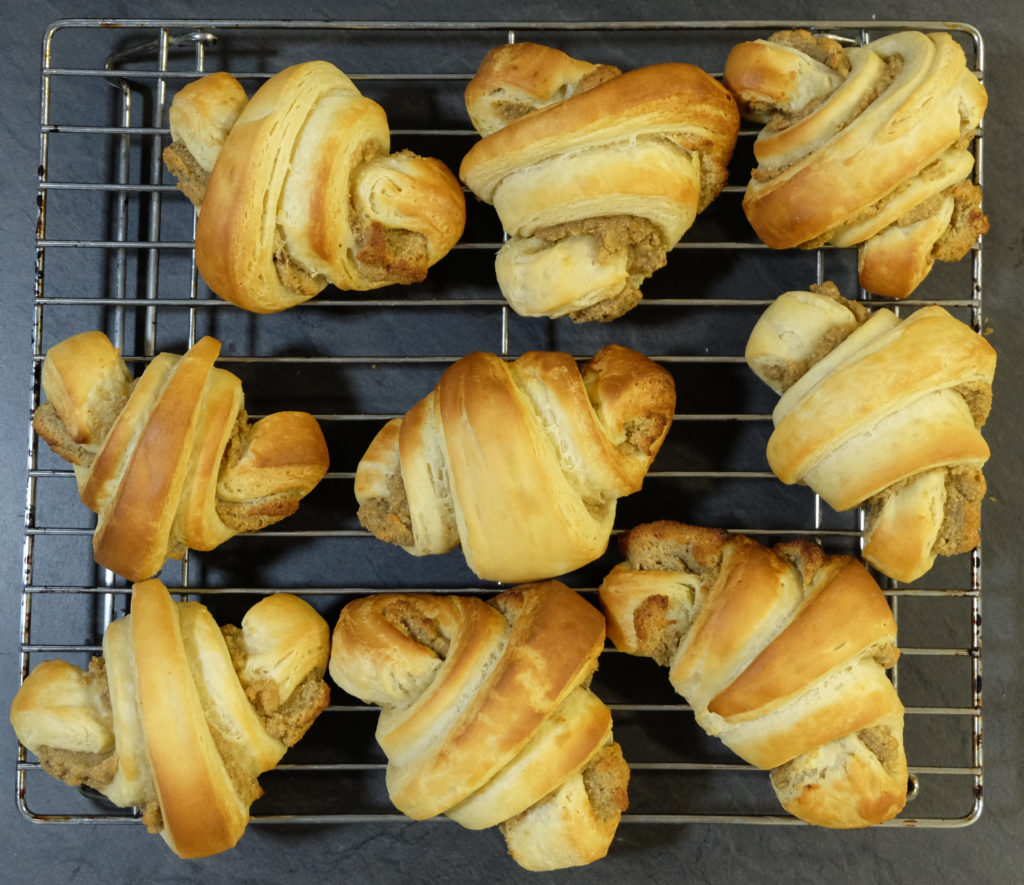
11th of November is coming, and this is St. Martin’s Day. Time to prepare a special treat: St. Martin’s croissants.
11 Listopada zbliża się, a z nim Dzień Świętego Marcina. Czas przygotować coś wyjątkowego: Rogale Świętomarcińskie.
Poznań – a beautiful Polish city, has its traditions. One of them is its patron saint’s day. Having Saint Martin’s croissants is part of the celebration and in the old days it was the only chance to enjoy these delicacies.
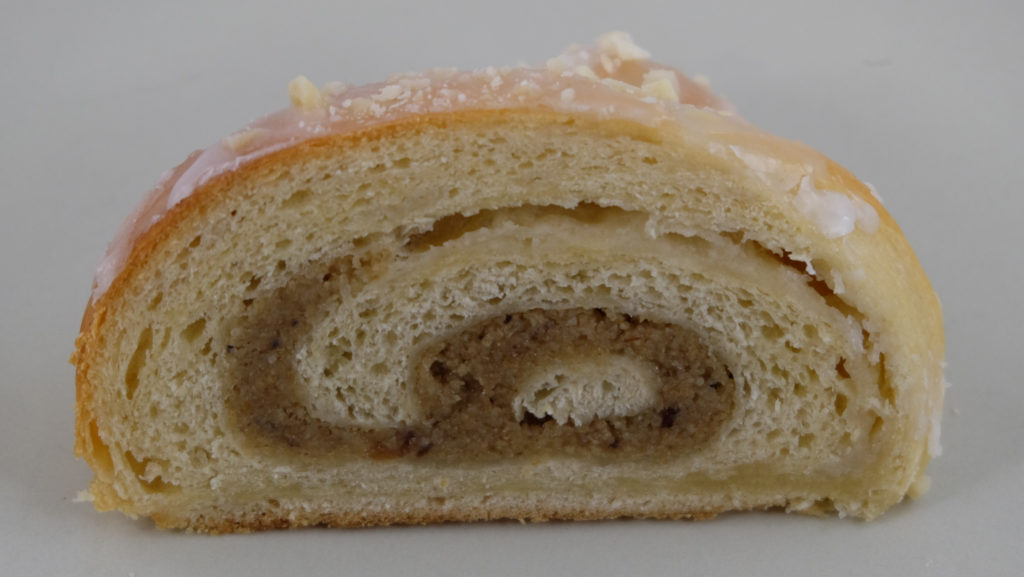
The croissant is made with Danish pastry, white poppy based filling, coated with icing and covered with almonds. I wanted to make them before and now seemed like the best time to try.
Since I have never made croissants before, I had to do some trials: I found the recipe to try, made the Danish pastry, rolled some croissants, kept watching videos about them. While the final shape is in most cases far from ideal, I am very happy with it. Interestingly, I think they taste better on second day then on the first.

The recipe comes from ArtKulinaria blog (sources). I made the same amounts, but now think that half of the dough serving is much easier to handle, so I recommend either making 12 croissants (half of the quantities provided) or splitting the dough in two halves when starting to laminate it. It cools down faster, is easier to roll and one half can wait in the fridge when you’re preparing the other.
Planning
I recommend preparing the dough and the filling the day before you make the croissants. This will leave you with much less work on the last day.
Preparing the dough takes about 2-2.5 hours, preparing the filling – about 2 hours together with all the waiting. The dough requires some discipline with timing, the filling does not and you can extend the breaks and spread the preparation as you wish.
Tools
You will need a couple things. I’m (of course) using a kitchen robot to make my life easier.
Filling
- a rather large saucepan (the poppy expands when cooked)
- a very fine strainer or a strainer and a gauze
- two bowls
- a grinder for grinding the poppy seeds (they are also referred to as meat grinders)
The dough
- two mixer bowls: for whisking the eggs and for making the dough (I could go with one, but I have two, and it makes things easier)
- a bowl for the yeast starter
- a pan to warm the milk up. I also used a thermometer to get it to 37-40 C
- a small pan to melt the butter
- a bowl for a frozen butter. Hint: grated frozen butter takes up way way more space than in packaging; make it a rather big one. A soup bowl will fit 150 g of butter, so you’ll need two
- a rolling pin
- two baking trays lined with baking paper (for 12 croissants)
- a small plate for the salt (measure it before to not have to remember later)
- a pizza knife
- a sieve
- a grater
Ingredients
This is enough for around 24 croissants.
The filling
- 500 g white poppy
- 300 g dried sponge cake crumbs (I got some ladyfingers from the store and ground them as I had no time to make one at home)
- 500 g sugar (I followed the author’s advice to use 250 g sugar and 250 g honey)
- 85 g butter
- 85 g raisins
- 85 g nuts (I followed the author’s advice to use 100 g almonds)
- 2 tablespoons of orange peel (I made my own)
- 250 g eggs (without shells, of course), this is approximately 5 eggs
- a couple drops of almond oil or extract
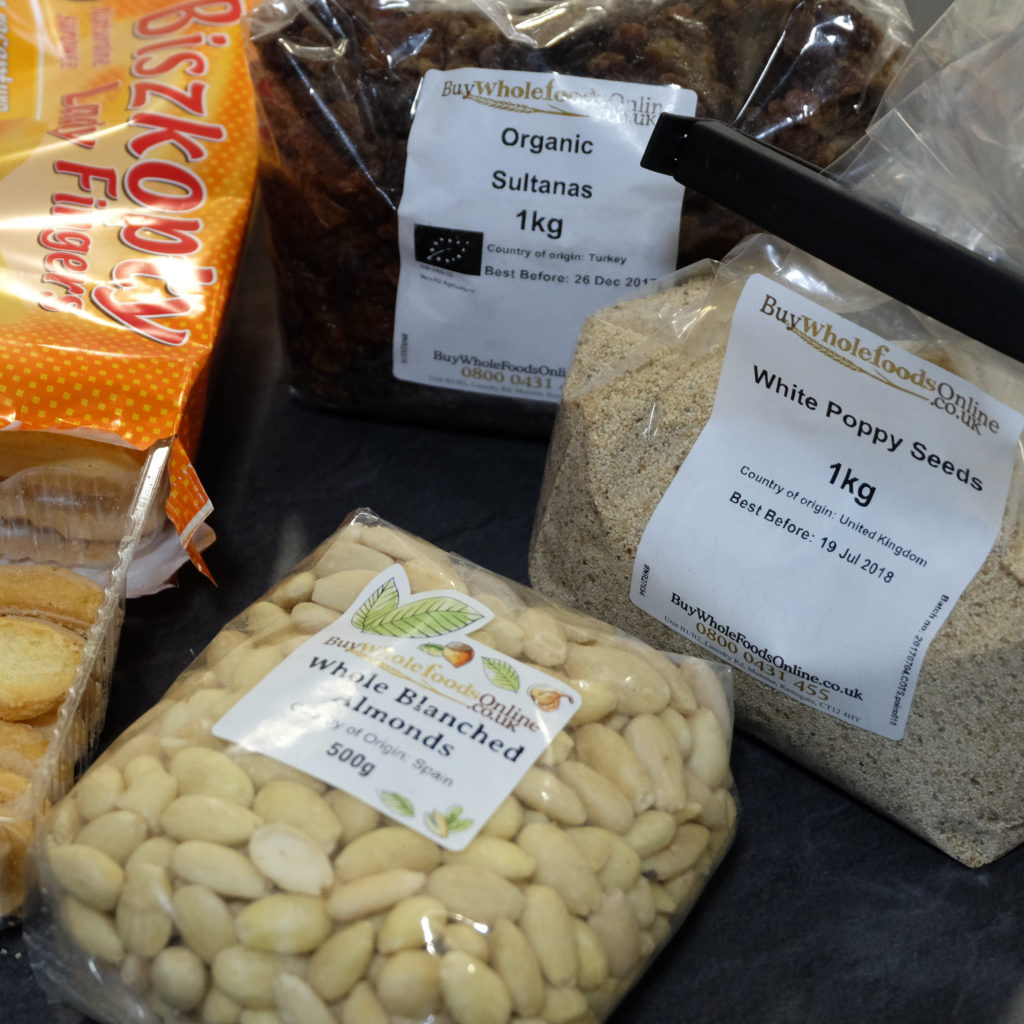
This looks like a sponsored pic, but it’s not. I just like them.
The dough
- 1000 g Plain wheat flour
- 400 ml Milk
- 120 g Sugar
- 120 g Butter
- 2.5 Eggs (two eggs and a yolk)
- 4 g Salt
- 20 g Fresh yeast
- 300 g Butter (frozen)
The icing
- 200 g icing sugar
- a few spoons of hot water
- about 100 g coarsely chopped almonds
Preparation
The filling
Before
- Blanche you almonds. I have bought already blanched ones
- Grind your almonds finely
- Grind your sponge cake finely
- Chop the raisins
- Rinse the eggs with boiling water – put them on a plate in your sink and pour a lot of freshly boiled water onto them. This is important: you will be adding raw eggs to the filling and leaving it this way until baking
Actual Recipe
- Rinse the poppy, then put in a saucepan, cover with boiling water and hold on a small heat for about 30 minutes. Stir from time to time
- Remove the water form the poppy and let it cool down
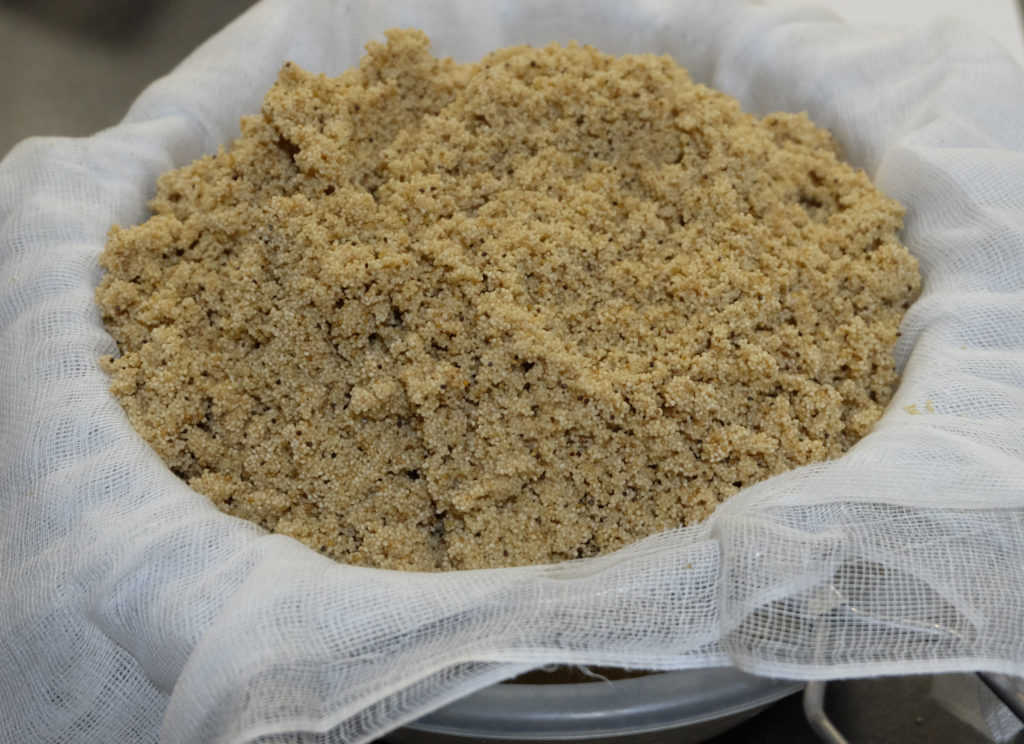
Removing water from cooked poppy - Grind it three times in a food grinder with smallest holes
- Melt the butter on a low heat, add sugar and honey and dissolve into a syrup
- Add chopped raisins, the orange peel and almonds. Stir it regularly for a few moments, until you can see everything soaked the syrup up a bit
- Add ground poppy, mix it well and keep stirring for 5-10 minutes on a low heat. Make sure it does not burn on the bottom
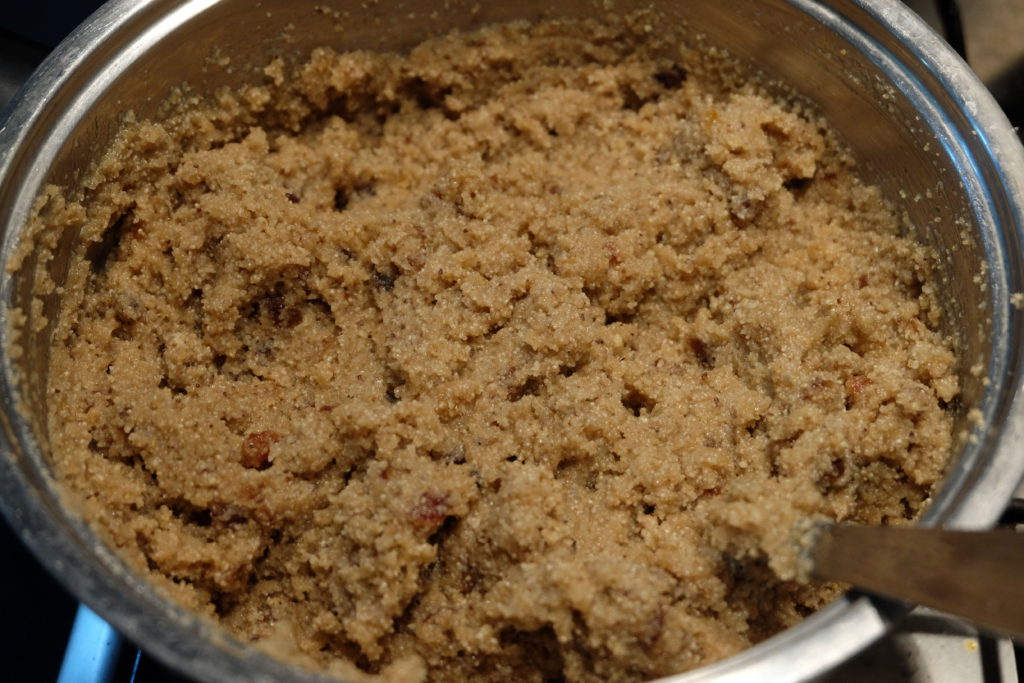
Filling in the making - Let it cool down
- Keep mixing the filling in a mixer now. Note that I don’t know what word to use here, Polish “ucierać” means something like smearing on the walls of a bowl to make finer and I used mixer part with rubber feathers doing precisely that. Without it I would use a whisk beater.Add a few drops of the almond extract and the sponge cake crumbs until they get incorporated
- Start adding eggs, one by one. Do not add another egg until the previous one gets incorporated. If the filling starts getting runny, don’t add any more eggs
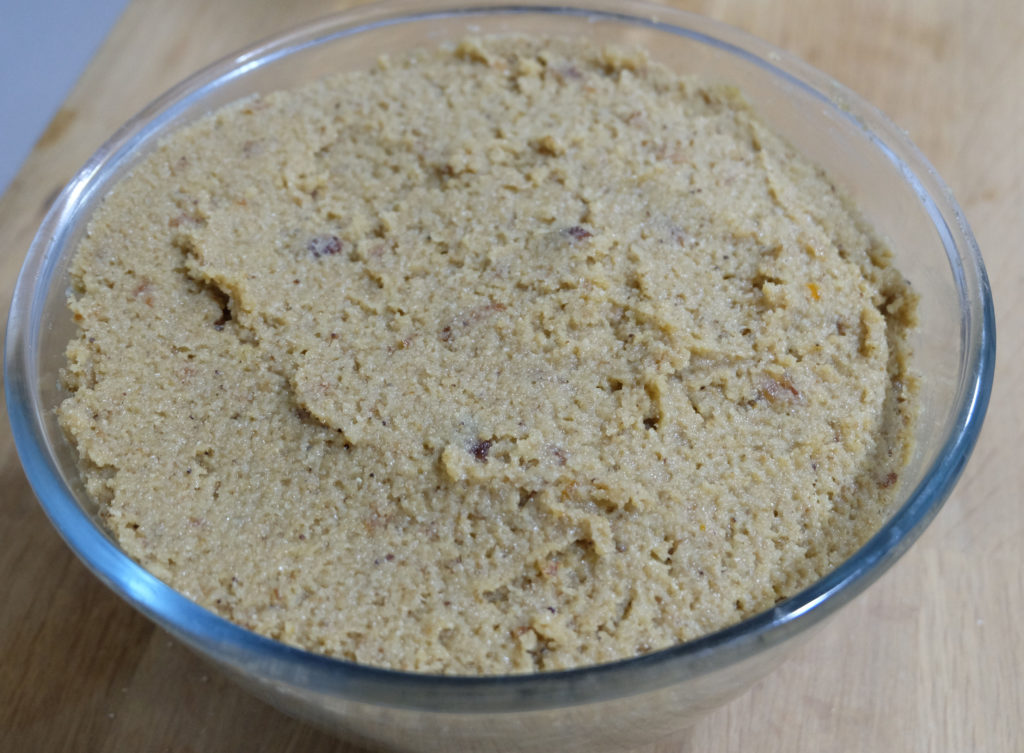
White poppy and almonds filling I refrigerated it for the following day to make the croissants.
The dough
- Get the ingredients warm before making anything. Effectively this means: make sure you have two eggs at room temperature – the butter gets melted, the milk gets warmed up. Getting the eggs from the fridge to room temperature takes about 1 hour, I recommend doing it much earlier, then you don’t have to wait
- Warm the milk carefully on a small heat.
In the meantime sieve the flour into a bowl - Make the starter: When the milk is at 37 C, not more than 40, crumble the yeast into a bowl and add 12 g (2 teaspoons) of sugar, then use a spoon to turn it into a paste. It will quickly get runny. Make sure most sugar dissolves.
Add 7-8 teaspoons of flour from the bowl.
Add 200 g milk and mix it all. It will be quite runny overall.
Leave this for 20 minutes - In the meantime put eggs into a bowl with 108 g of sugar and whisk it. I used a mixer, you can use a blender.
- In the meantime melt 120 g of butter and then leave it to cool down
- By now the starter should be ready. Start a mixer with flour. I used a dough hook for this. Add the starter. Add the whisked eggs. Add remaining milk. Add salt. Remember salt. Salt is very important. Salt is essential. Salt is key. OK, I’m exaggerating, just don’t forget about it, the dough won’t work without it
- When the dough is all well mixed and you can clearly see the gluten working well, start adding the melted butter bit by bit. I add in more or less 20 g batches and wait in between until it is fully incorporated in the dough
- Take the dough out and knead it for a bit. It is warm, stretchy, very pleasant. Does not stick to the surface. I really just form a ball with it and put it into a bowl and cover to rise for 30 minutes (in my experience all the steps from point 2 until now have taken 30 minutes as well)
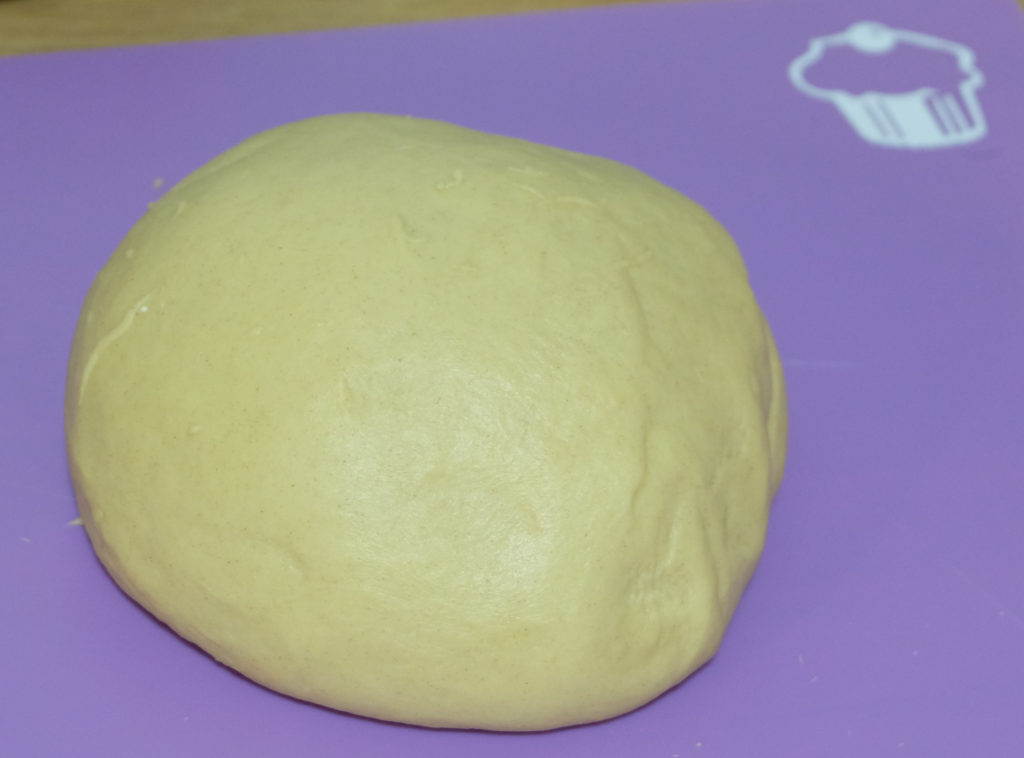
The dough should be nice, soft and stretchy - Grate the 300 g of frozen butter and put it in a fridge
- When the dough is ready, take it out of the bowl, knock the air out and knead a little bit. Use a rolling pin to form a rectangle. Mine was about 45 x 30 cm
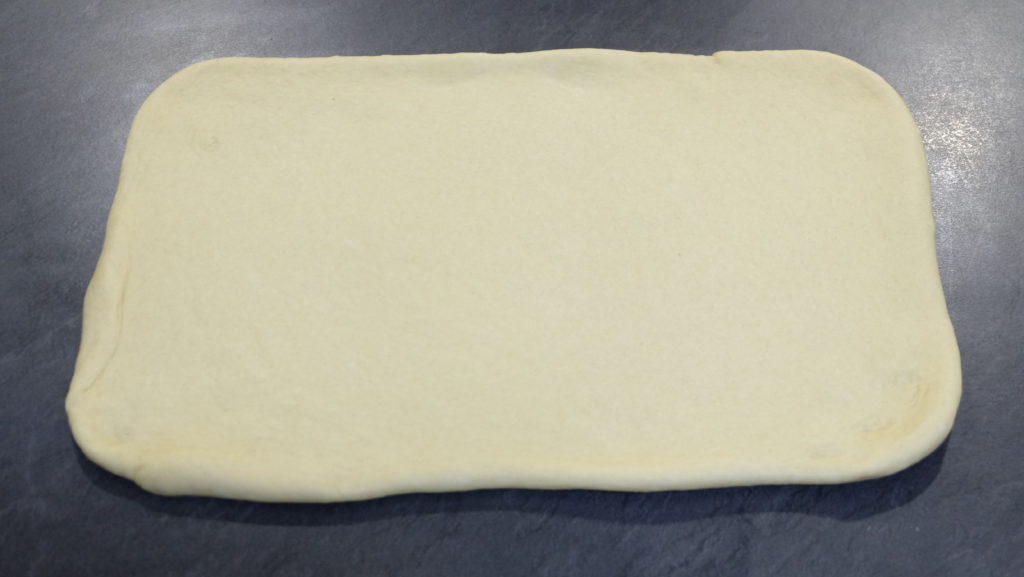
The dough ready for the butter - Put the grated butter on a 30 x 30 cm surface, leave a 30 x 15 cm side aside. Fold the clean wing inside, make sure to match the parts’s edges. Then fold it again to form three layers. When folding, try your best to make equal rectangles
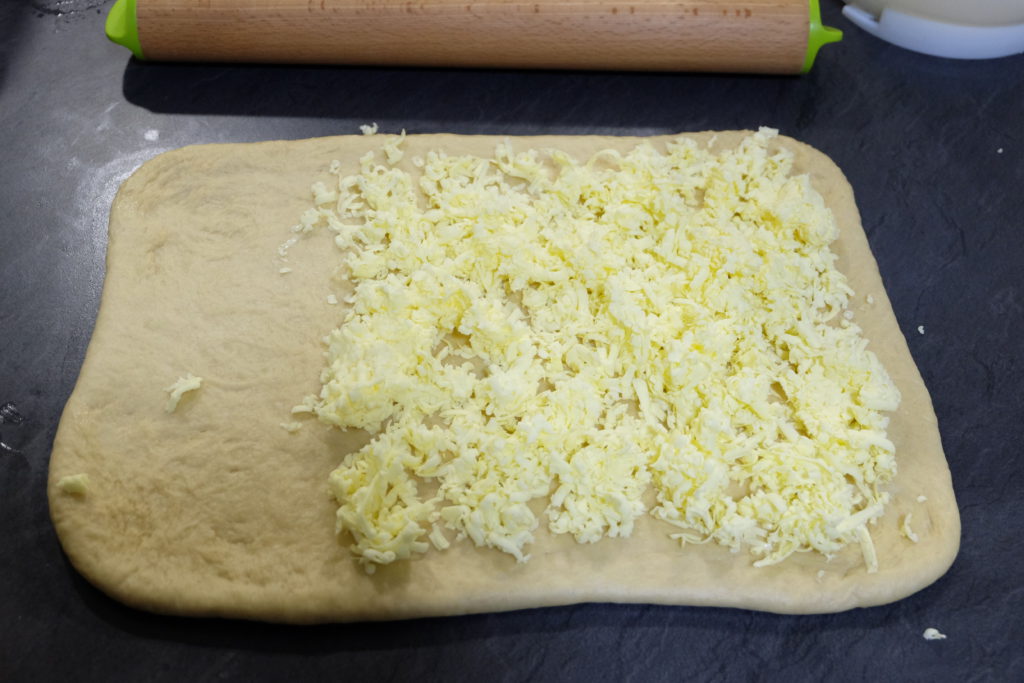
Here’s butter on the dough 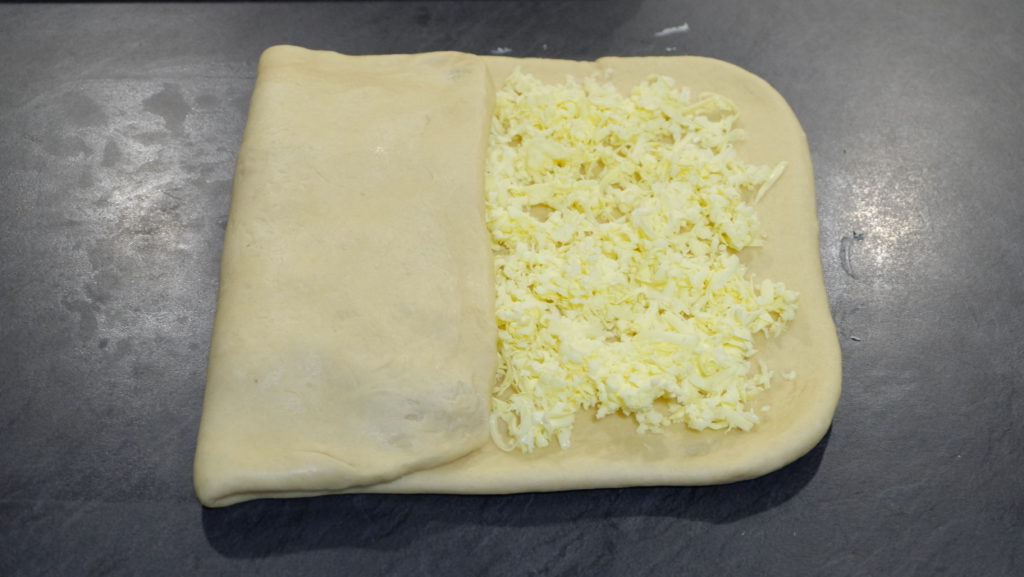
Folding the dough - Roll it flat and fold again in three (nine layers)
- Roll it a bit more, wrap in cling film and refrigerate for 30 minutes
- Take it out, roll, fold in three (twenty seven layers), roll it a bit more, wrap in cling film and refrigerate for 30 minutes
- Take it out, roll, fold in three (eighty one layers), roll it a bit more, wrap in cling film and refrigerate for at least 30 minutes.
This is an important moment. By now you have spent about 2-2.5 hours from making a starter to preparing the dough. You can pick it up after the mentioned 30 minutes and use it or give it more time, up to 24 hours (I read somewhere). In my case I made a break to put the kids to bed and then got back to making the croissants - Take the dough out of the fridge
- Set the oven to 180-190 C
- Roll the dough into a rectangle, about 5 mm thick. It’s more of a trapezium (to make the edge croissants easier to make). Make sure you don’t go over 30 cm in height of the trapezium (not enough width then). Add a bit of flour under the dough before rolling, it will make the whole process much easier. When ready, cut off a tiny strip on each end of dough to expose the layers (this will make the first and last croissant look awesome)
- I marked six sections on each side of the dough and cut out triangles using the pizza knife
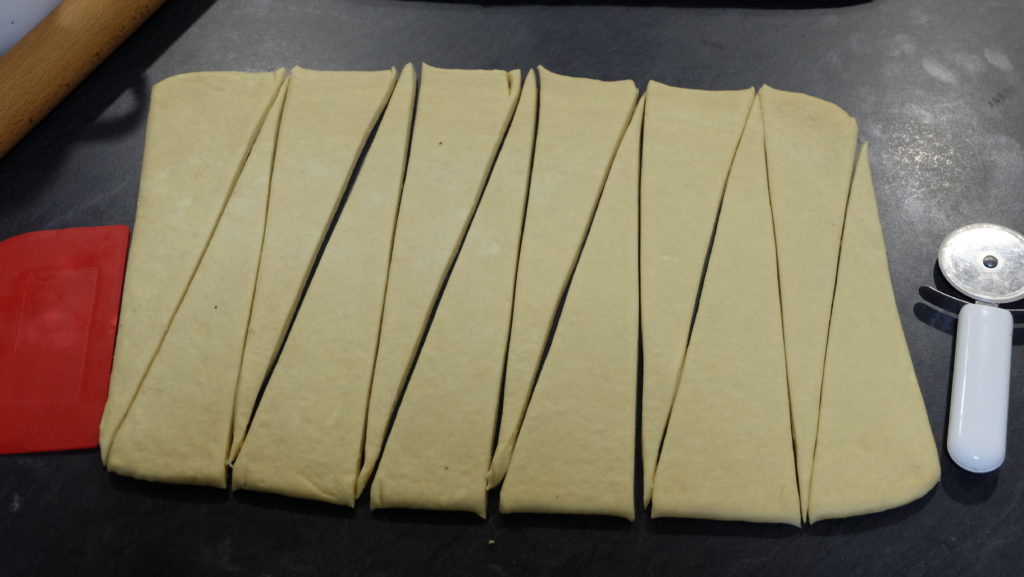
Cut out triangles - Take each triangle, put the filling on, fold about 4-5 cm of the base inside and make about a 3-4 cm cut in the middle
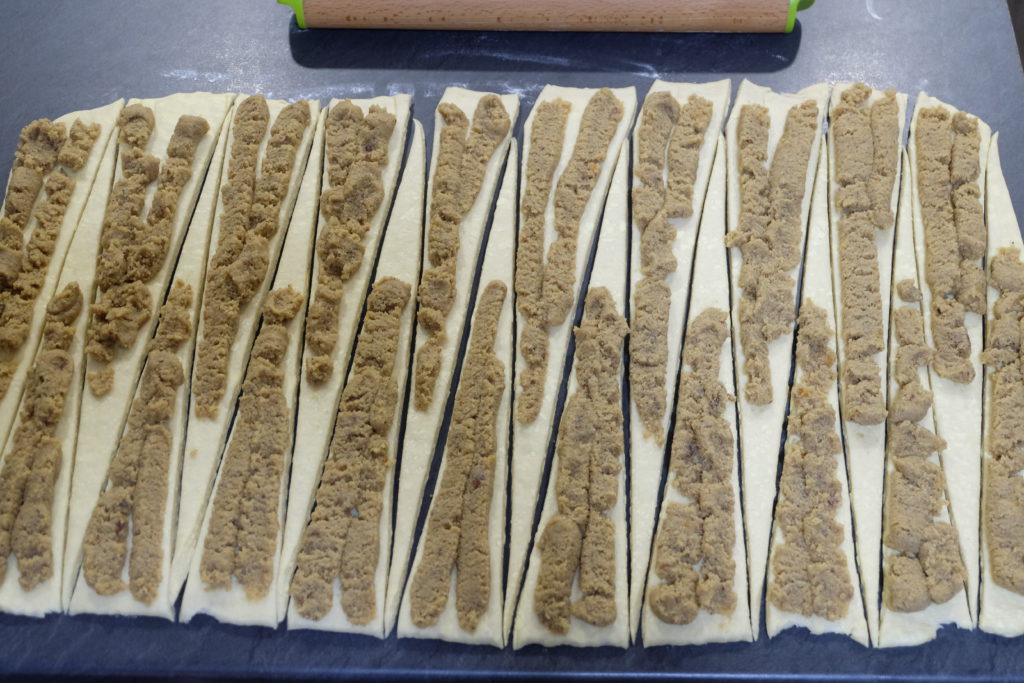
With the filling - Expand the two parts of the cut outward (This way you get a lot of filling in the ends of the croissant) and roll it. Then round it a little bit to a moon-like shape
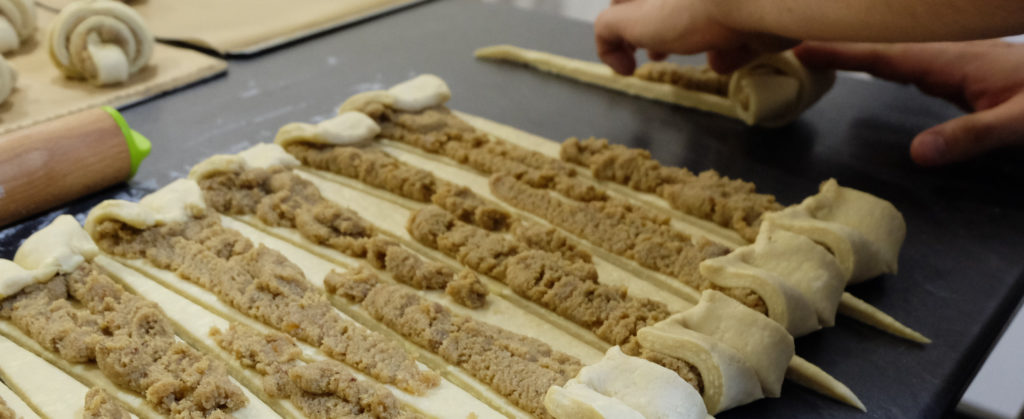
Folding the ends, rolling - Place on a baking tray and leave for 30 minutes to rise
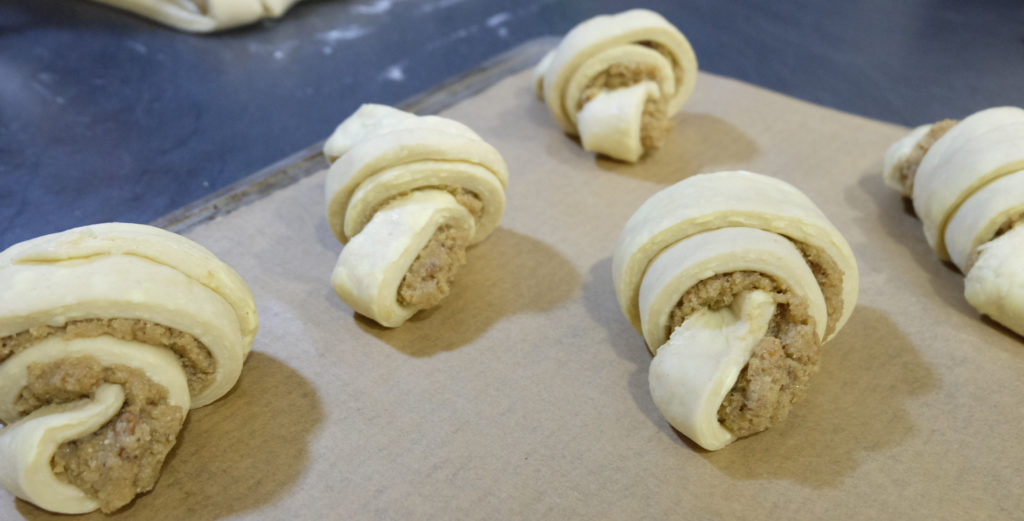
Final rise - Brush it with water and bake for 20 minutes
- Prepare the icing now: putt the icing sugar into a bowl, add hot water spoon by spoon and before each mix it. Stop adding water when the icing is still quite dense, but a bit runny
- Monitor the progress, you may have to rotate the trays a little bit for an even colour
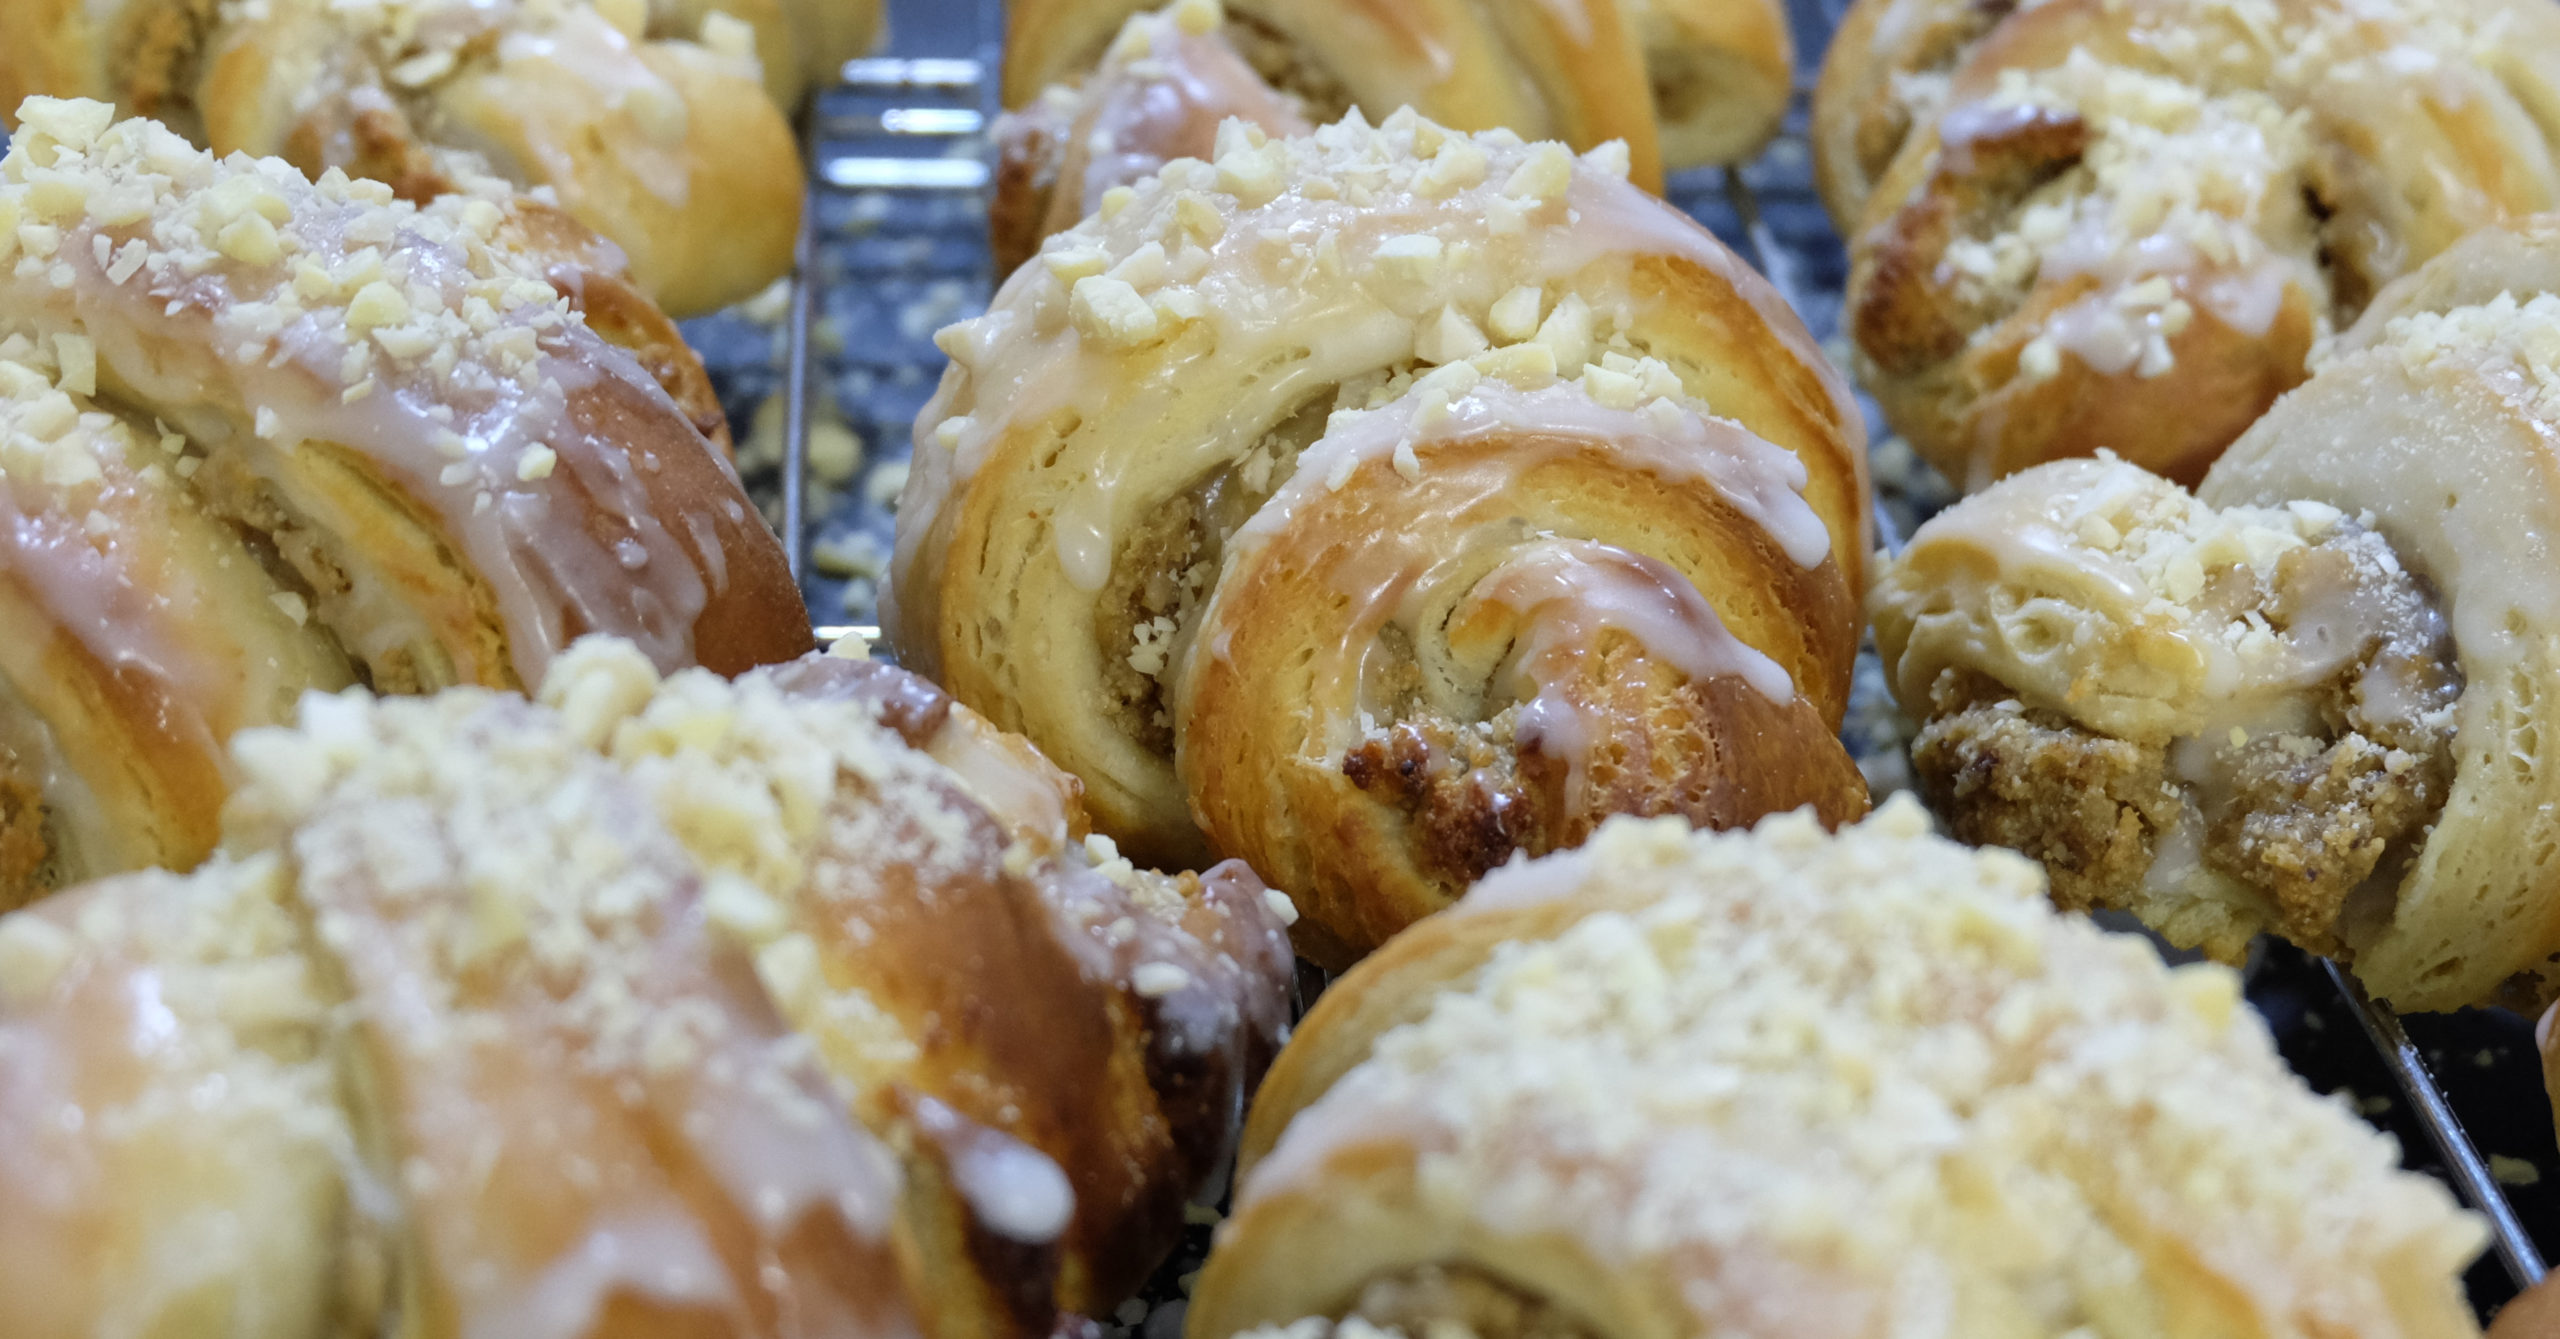
Saint Martin croissants - After taking them out, coat each croissant with icing and quickly sprinkle almonds on top. If you give it more time, the icing will get hard quickly and won’t stick
Let the croissants cool down a little bit before eating. The filling can burn your mouth when hot.
Boy, this was a lot of work, but I am pleased with the result. I ended up making twenty croissants as I worked with the whole batch of dough and it made it difficult to handle and roll. Also, I should have made the dough rectangle wider and shorter to have shorter, but wider triangles. The shaping has a lot of space for improvements as well, but hey, I made it!
Now it’s your turn.
Wersja polska
Poznań – piękne polskie miasto z tradycjami. Myślę że rogala świętomarcińskiego przedstawiać nie muszę. Ciasto półfrancuskie, farsz z białego maku, lukier i migdały. Chciałem je zrobić już wcześniej, a teraz wydaje się, że czas jest idealny.
Jako że wcześniej ich nie robiłem, miałem kilka etapów przygotowań: wybrałem przepis, zrobiłem ciasto półfrancuskie, zawinąłem kilka rogali, analizowałem firmy z cukierni. Mimo że większość końcowych wyrobów kształtem odbiega od ideału, jestem z nich bardzo zadowolony. Co interesujące, wydaje mi się że na drugi dzień smakują lepiej niż zaraz po pieczeniu.

Przepis pochodzi z bloga ArtKulinaria (źródła). Wykonałem go z podanych ilości, ale teraz myślę, że łatwiej jest pracować z połową ciasta, więc albo zrób 12 rogali, albo podziel ciasto na pół przed składaniem. Będzie się szybciej schładzać, jest łatwiejsze w obróbce, a i połowa poczeka sobie w lodóce na przygotowanie pierwszej partii.
Planowanie
Polecam przygotować ciasto i nadzienie na dzień przed pieczeniem. W ten sposób na końcówce będzie mniej pracy.
Przygotowanie ciasta zabiera 2-2,5 godziny, przygotowanie nadzienia – około 2 godzin z całym czekaniem. Ciasto wymaga trochę dyscypliny czasowej, nadzienie – nie, jego przygotowanie można rozłożyć sobie wedle życzenia.
Narzędzia
Będziesz potrzebować kilku rzeczy. Ja (oczywiście) ułatwiam sobie życie robotem planetarnym i bardzo polecam ten styl.
Nadzienie
- raczej duży rondel (mak przy gotowaniu zwiększy objętość)
- bardzo drobne sitko lub sitko z gazą
- dwie miski
- maszynka do mielenia
Ciasto
- dwie miski do miksera: do ubicia jajek i do robienia ciasta (mogłem użyć jednej, ale miałem dwie, więc tak było mi łatwiej)
- miskę na rozczyn
- garnek do podgrzania mleka. Użyłem też termometru, aby trafić w 37-40 stopni
- mały garnuszek do roztopienia masła
- miskę na zamrożone masło. Uwaga: starte masło zajmuje dużo więcej niż kostka; zadbaj o dużą miskę. Taka zupowa pomieści 150 g masła po starciu, więc potrzeba dwóch takich
- wałek
- dwie tacki wyłożone papierem do pieczenia (na 12 rogali)
- mały talerzyk na sól (odmierz wcześniej, nie będziesz się przejmował nią później)
- nóż do pizzy
- sitko
- tarka
Lukier
- miska
Składniki
Wystarczy na 24 rogale.

Nadzienie
- 500 g białego maku
- 300 g okruchów biszkoptowych (ja kupiłem te całe Ladyfingers i zmieliłem, bo już nie wyrobiłem się z pieczeniem własnego biszkoptu)
- 500 g cukru (za radą autorki użyłem 250 g cukru i 250 g miodu)
- 85 g masła
- 85 g rodzynek
- 85 g orzechów (za radą autorki użyłem 100 g migdałów)
- 2 łyżki skórki pomarańczowej (ja zrobiłem własną, z tego przepisu)
- 250 g jajek (bez skorupek, rzecz jasna), to około 5 jajek
- kilka kropli olejku lub ekstraktu migdałowego
Ciasto
- 1000 g mąki tortowej
- 400 ml mleka
- 120 g cukru
- 120 g masła
- 2.5 jajka (dwa całe i żółtko)
- 4 g soli
- 20 g świeżych drożdży
- 300 g masła (mrożonego)
Lukier
- 200 g cukru pudru
- kilka łyżek gorącej wody
- grubo posiekane migdały
Przygotowanie
Nadzienie
Przed robieniem
- Zblanszuj migdały. Ja kupiłem od razu obrane
- Zmiel migdały na drobno
- Zmiel biszkopt na okruchy
- Posiekaj rodzynki
- Wyparz jajca wrzątkiem – połóż je na talerzyku w zlewie i polej dużą ilością świeżo zagotowanej wody. To jest ważne: będziesz dodawać surowe jajka do masy i zostawisz tak na jakiś czas przed pieczeniem
Przepis właściwy
- Wypłucz mak, umieść w garnku, zalej wrzątkiem do przykrycia i umieść na małym ogniu na jakieś 30 minut. Mieszaj od czasu do czasu
- Usuń wodę z maku i daj mu ostygnąć

Odcedzanie maku - Zmiel mak trzy razy w maszynce z sitkiem z najmniejszymi oczkami
- Stop masło na małym ogniu, dodaj cukier z miodem i rozpuść na syrop
- Dodaj siekane rodzynki, skórkę pomarańczową i migdały. Mieszaj regularnie przez kilka chwil, aż zobaczysz, że bakalie nasiąknęły syropem
- Dodaj zmielony mak, dobrze połącz i mieszaj co chwilę przez 5-10 minut na małym ogniu. Pilnuj, żeby nie przypaliło się od spodu
- Pozostaw do ostygnięcia

Nadzienie w przygotowaniu - Teraz ucieraj masę. Dodaj do niej kilka kropli ekstraktu i okruchy biszkopta, aż dobrze się wymiesza
- Zacznij dodawać jajka. Rób to pojedynczo. Kolejne jajko dodawaj dopiero gdy poprzednie się całkiem wchłonie. Jeśli masa zrobi się lejąca, nie dodawaj już jajek

Masa z białego maku i migdałów
Schowałem masę do lodówki, aby użyć następnego dnia.
Ciasto
- Wyjmij składniki z lodówki zanim cokolwiek zrobisz. W zasadzie oznacza to konieczność zadbania, żeby mieć dwa jajka w temperaturze pokojowej – masło się roztapia, mleko podgrzewa. Ogrzanie jajek zabiera około godziny. Jeśli wyjmiesz je dużo wcześiej, oszczędzisz na czekaniu na początku przygotowań
- Zagrzej ostrożnie mleko na małym ogniu
W międzyczasie przesiej mąkę do miski - Przygotuj rozczyn: zacznij szykować gdy mleko będzie już w dobrej temperaturze; pokrusz drożdże do miski i dodaj 12 g (2 łyżeczki) cukru, rozetrzyj je w pastę – szybko się zrobi płynna; upewnij się że większość cukru się rozpuści.
Dodaj 7-8 łyżeczek mąki z miski
Dodaj 200 g mleka i wymieszaj wszystko. Teraz całość będzie raczej lejąca.
Pozostaw na 20 minut - W międzyczasie umieść jajko i żółtko z 108 g cukru w misce i ubij je. Ja ubijałem mikserem, Ty możesz użyć też blendera
- W międzyczasie roztop 120 g masła i pozostaw do ostygnięcia
- Teraz rozczyn powinien być gotowy. Uruchom mikser z miską z mąką. Ja użyłem haka do ciasta. Dodaj rozczyn. Dodaj ubite jajka. Dodaj pozostałe mleko, Dodaj sól. Pamiętaj o soli. Sól jest bardzo ważna. Sól jest niezbędna. Sól jest kluczowa. OK, trońkę przesadzam, ale nie zapomnij o niej, bez soli nie wyjdzie tak dobrze
- Gdy ciasto będzie już dobrze wymieszane i będziesz wyraźnie widzieć, że gluten pracuje, zacznij po trosze dodawać masło. Ja dodawałem po około 20 g na raz i czekałem aż się wchłonie przed dodaniem kolejnych
- Weź ciasto i trochę je wyrób. Jest ciepłe, rozciągliwe i bardzo przyjemne w dotyku. Nie klei się do blatu. Ja w rzeczywistości jedynie uformowałem z niego kulę i zostawiłem w przykrytej misce na 30 minut (w mojej ocenie wszystkie dotychczasowe działania również zajęły 30 minut)

Ciasto powinno być fajne, delikatne i rozciągliwe - Zetrzyj 300 g mrożonego masła i umieść w lodówce
- Kiedy ciasto będzie gotowe, wyjmij je z miski, odgazuj i powyrabiaj trochę. Użyj wałka, aby uformować prostokąt. Mój zajął około 45 x 30 cm

Ciasto w oczekiwaniu na masło - Wyłóż masło na obszar 30 x 30 cm, jedna trzecia 30 x 15 pozostaje z brzegu czysta. Zagnij ją do środka, dopasuj krawędzie. Następnie znów zagnij, aby powstały trzy warstwy. Kiedy zaginasz, staraj się utrzymać równy kształt prostokąta

Masło na cieście 
Składanie ciasta - Rozwałkuj i złóż znów na trzy (dziewięć warstw). Pamiętaj o krawędziach i kształcie
- Rozwałkuj jeszcze trochę, zawiń w folię i schłódź przez 30 minut
- Wyjmij, rozwałkuj, złóż na trzy (dwadzieścia siedem warstw), rozwałkuj jeszcze trochę, zawiń w folię i schłódź przez 30 minut
- Wyjmij, rozwałkuj, złóż na trzy (osiemdziesiąt jeden warstw), rozwałkuj jeszcze trochę, zawiń w folię i schłódź przez minimum 30 minut.
To jest ważny moment. Robisz ciasto od 2-2,5 godzin od zrobienia rozczynu. Możesz je wziąć od razu po 30 minutach, albo przechować do 24 godzin (gdzieś wyczytałem). Ja zrobiłem sobie przerwę na położenie dzieci do łóżka i potem wróciłem do formowania - Wyjmij ciasto z lodówki
- Nastaw piekarnik na 180-190 stopni
- Rozwałkuj ciasto na prostokąt grubości około 5 mm. Właściwie to raczej na trapez (żeby ładne trójkąciki powycinać). Zadbaj, żeby raczej nie był wyższy niż 30 cm, za to szeroki – wtedy trójkąty będą szersze i wejdzie więcej farszu. Podsyp leciutko mąką, wtedy będzie się dużo łatwiej wałkować. Kiedy ciasto będzie przygotowane, odetnij cieniutki pasek na krawędziach, aby uwidocznić warstwy (brzegowe rogale będą dzięki temu lepiej wyglądać)
- Na brzegach ciasta oznaczyłem sześć odcinkówi użyłem tego do wycięcia trójkątów, używając noża do pizzy

Wycinanie trójkątów - Weź kolejne trójkąty, ponakładaj nadzienie, zawiń około 4-5 cm ciasta u podstawy i natnij na 3-4 cm w środku

Z nadzieniem - Rozłóż nacięte końcówki do zewnątrz (W ten sposób będziesz mieć dużo nadzienia w rogach rogala) i zawiń. Zagnij nieco rogala w kształt księżyca

Zawijanie końców, rolowanie - Umieść na papierze do pieczenia na tackach i pozostaw na 30 minut do wyrośnięcia

Końcowe wyrastanie - Posmaruj wodą i piecz przez 20 minut
- Teraz przygotuj lukier: włóż cukier do miski i dodawaj po jednej łyżce wody, następnie mieszaj do całkowitego wchłonięcia. Przestań dodawać wodę gdy lukier powoli zacznie się lać
- Monitoruj postęp. Możesz musieć poprzekładać tacki, żeby równo się upiekło

Rogale świętomarcińskie - Świeżo wyjęte rogale posmaruj lukrem i natychmiast posyp migdałami, aby lukier nie wysechł i nie przestał się kleić
Pozostaw na chwilę do ostygnięcia. Nadzienie w gorących może oparzyć usta.

Uff, to było dużo pracy, ale jestem zadowolony z rezultatów. Wyszło mi 20 rogali, bo nie poradziłem sobie z całym ciastem w jednym kawałku: nie rozwałkowałem go dobrze. Powinienem też zrobić niższy i szerszy prostokąt, aby trójkąty miały szersze podstawy. Formowanie generalnie ma potencjał do poprawy, ale udało się!
Teraz Twoja kolej.

najwspanialsze rogale ❤ szkoda, że nie mogę sprowadzić tu maku 😦
Tu czyli gdzie?